React, Highcharts and Spring Boot Integration
React, Highcharts and Spring Boot Integration
Introduction
If you search for a tutorial online about React, Highcharts and Spring Boot Integration, most of the times you end up with tutorials which are not that that easy to follow. Hence I decided to come up with this blog post to explain the concepts of integrating React, Highcharts and Spring Boot in simple language which is very easy to follow. This blog post will give you a comprehensive overview of the following:
- Building a simple React App
- Integrating the React App with a Spring Boot Application and using CRUD operations
- Integrating React, Highcharts and Spring Boot Application to view charts
React
React is one of the most popular JavaScript libraries for building user interfaces. To know more about React, please check React Website.
Highcharts
Highcharts is a software library, written in pure JavaScript, that can be used to setup interactive charts in applications or websites. To know more about Highcharts, please check Highcharts Website.
Spring Boot
From their website:
Takes an opinionated view of building production-ready Spring applications. Spring Boot favors convention over configuration and is designed to get you up and running as quickly as possible.
Spring Boot makes it easy to create stand-alone, production-grade Spring based Applications that you can "just run". We take an opinionated view of the Spring platform and third-party libraries so you can get started with minimum fuss. Most Spring Boot applications need very little Spring configuration. To know more about Spring Boot, please check: Spring Boot Website
Requirements to Run the Application:
If you prefer using any other tool for working on the UI code, you can go ahead and use it.- Node.js
- Node Package Manager (NPM)
- Visual Studio Code or any IDE that supports working on UI code.
- Java
- Maven
- IDE of your choice for the Spring Boot Application
Node.js, NPM and React CLI should be setup and running in your machine. To setup, run and test if all these are working fine, please refer to my post below:
Nodejs and React CLI Setup.
I prefer using Visual Studio Code for working on the UI code. It can be downloaded from Microsoft Visual Studio Code Website.
To get to know more about Visual Studio Code, you can read: Getting Started on Visual Studio Code.
Nodejs and React CLI Setup.
I prefer using Visual Studio Code for working on the UI code. It can be downloaded from Microsoft Visual Studio Code Website.
To get to know more about Visual Studio Code, you can read: Getting Started on Visual Studio Code.
I am assuming that you have a Basic Knowledge of Spring Boot. If not, please check my blog post on Basic Spring Boot Application by going to the link: Spring Boot Tutorial
In this post, I am building a simple UI Employee CRUD application which fetches employee data from a Spring Boot Application. To keep things simple, I am storing employee data in memory in a list in the Spring Boot Application.
Once you have the initial setup mentioned above, you can build the application in few simple steps.
Application 1: Spring Boot Application with the CRUD APIs and Chart APIs
Step 1: Setup the required libraries in pom.xml
<?xml version="1.0" encoding="UTF-8"?>
<project xmlns="http://maven.apache.org/POM/4.0.0" xmlns:xsi="http://www.w3.org/2001/XMLSchema-instance" xsi:schemaLocation="http://maven.apache.org/POM/4.0.0 http://maven.apache.org/xsd/maven-4.0.0.xsd">
 <modelVersion>4.0.0</modelVersion>
 <groupId>com.aj.springbootinmemorydata</groupId>
 <artifactId>SpringBootInMemoryData</artifactId>
 <version>1.0.0</version>

 <parent>
  <groupId>org.springframework.boot</groupId>
  <artifactId>spring-boot-starter-parent</artifactId>
  <version>2.0.5.RELEASE</version>
 </parent>

 <properties>
        <jdk.version>1.8</jdk.version>
        <java.version>1.8</java.version>
        <swagger.version>2.9.2</swagger.version>
  <packaging>jar</packaging>
 </properties>

 <dependencies>

  <dependency>
            <groupId>org.springframework.boot</groupId>
            <artifactId>spring-boot-starter-web</artifactId>
        </dependency>

        <!--Swagger API Documentation related dependencies Start-->
        <dependency>
            <groupId>io.springfox</groupId>
            <artifactId>springfox-swagger2</artifactId>
            <version>${swagger.version}</version>
        </dependency>
        <dependency>
            <groupId>io.springfox</groupId>
            <artifactId>springfox-swagger-ui</artifactId>
            <version>${swagger.version}</version>
        </dependency>
        <!--Swagger API Documentation related dependencies End-->

 </dependencies>

 <build>
  <plugins>
            <plugin>
                <artifactId>maven-compiler-plugin</artifactId>
                <version>3.0</version>
                <configuration>
                    <source>1.8</source>
                    <target>1.8</target>
                </configuration>
            </plugin>
   <plugin>
    <groupId>org.springframework.boot</groupId>
    <artifactId>spring-boot-maven-plugin</artifactId>
   </plugin>
  </plugins>
 </build>
</project>
Step 2: Create the Employee Data Model and Pie Chart Data Model
I am using the following attributes in the Employee Data Model:
Chart related APIs to be used by Highcharts are created in ChartController.java. Here is the full code:
Program arguments: src/main/resources/application.yml
 2. To run JAR from command prompt:
Build jar by using command:
mvn clean install
Run JAR in the Project folder location by using the command :
Please note: I have set the server port as 4000 in application.yml
3. To test the APIs present in the Spring Boot Application use Swagger UI. I am assuming that you have a basic knowledge of Swagger API documentation. If not, please check my blog post on Swagger by going to the link: Spring Boot REST API Documentation With Swagger
Open Swagger UI using the URL: http://localhost:4000/swagger-ui.html

4. In the React project folder location run the command:

In the UI, click the Add or Update button

- Id
- Name
- Department
- Salary
- Gender
Here is the class Employee.java:
package com.aj.springbootinmemorydata.domain;

public class Employee implements Comparable<Employee> {

    private Integer id;
    private String name;
    private String department;
    private Integer salary;
    private String gender;

    public Employee(Integer id, String name, String department, Integer salary, String gender) {
        this.id = id;
        this.name = name;
        this.department = department;
        this.salary = salary;
        this.gender = gender;
    }

    public Integer getId() {
        return id;
    }

    public void setId(Integer id) {
        this.id = id;
    }

    public String getName() {
        return name;
    }

    public void setName(String name) {
        this.name = name;
    }

    public String getDepartment() {
        return department;
    }

    public void setDepartment(String department) {
        this.department = department;
    }

    public Integer getSalary() {
        return salary;
    }

    public void setSalary(Integer salary) {
        this.salary = salary;
    }

    public String getGender() {
        return gender;
    }

    public void setGender(String gender) {
        this.gender = gender;
    }

    @Override
    public String toString() {
        return "Employee{" +
                "id=" + id +
                ", name='" + name + '\'' +
                ", department='" + department + '\'' +
                ", salary=" + salary +
                ", gender='" + gender + '\'' +
                '}';
    }

    @Override
    public int compareTo(Employee o) {
        return this.getId().compareTo(o.getId());
    }
}
Pie chart in Highcharts requires data with the following attributes:- Name
- y
Here is the class PieChart.java:
package com.aj.springbootinmemorydata.domain;

public class PieChart {

    private String name;
    private int y;

    public PieChart(String name, int y) {
        this.name = name;
        this.y = y;
    }

    public String getName() {
        return name;
    }

    public void setName(String name) {
        this.name = name;
    }

    public int getY() {
        return y;
    }

    public void setY(int y) {
        this.y = y;
    }
}
Step 3: Create the Service Class
In the service class, the in memory list of Employees is created. All the logic for the CRUD APIs and the APIs used by the charts is added in this class. Here is the class EmployeeServiceImpl.java:package com.aj.springbootinmemorydata.service.impl;
import com.aj.springbootinmemorydata.domain.Employee;
import com.aj.springbootinmemorydata.domain.PieChart;
import com.aj.springbootinmemorydata.service.EmployeeService;
import org.slf4j.Logger;
import org.slf4j.LoggerFactory;
import org.springframework.stereotype.Service;
import org.springframework.util.CollectionUtils;
import java.util.*;
import java.util.function.Function;
import java.util.stream.Collectors;
@Service
public class EmployeeServiceImpl implements EmployeeService {
private static final Logger logger = LoggerFactory.getLogger(EmployeeServiceImpl.class);
private static List<Employee> employees = new ArrayList<>();
private static Integer idCount = 0;
static{
employees.add(new Employee(++idCount, "Jim","Accounts", 10000,"Male"));
employees.add(new Employee(++idCount, "John","HR", 15000,"Male"));
employees.add(new Employee(++idCount, "Jane","IT", 20000,"Female"));
employees.add(new Employee(++idCount, "Mary","HR", 15000,"Female"));
employees.add(new Employee(++idCount, "Smith","IT", 25000,"Male"));
employees.add(new Employee(++idCount, "Mark","Accounts", 12000,"Male"));
}
public List<Employee> findAll() {
return employees;
}
public Employee save(Employee employee) {
if (employee.getId() == -1 || employee.getId() == 0) {
employee.setId(++idCount);
employees.add(employee);
} else {
delete(employee.getId());
employees.add(employee);
}
Collections.sort(employees);
logger.info("Sorted employees in EmployeeServiceImpl.save is: " + employee.toString());
return employee;
}
public Employee delete(Integer id) {
Employee employee = findById(id);
if (employee == null)
return null;
if (employees.remove(employee)) {
return employee;
}
return null;
}
public Employee findById(Integer id) {
for (Employee course : employees) {
if (course.getId() == id) {
return course;
}
}
return null;
}
public List<PieChart> getGenderDiversity(){
List<String> genders = new ArrayList<>();
List<PieChart> genderDiversity = new ArrayList<>();
for(Employee employee: employees){
genders.add(employee.getGender());
}
Map<String, Long> genderMap =
genders.stream().collect(
Collectors.groupingBy(
Function.identity(), Collectors.counting()
)
);
if(!CollectionUtils.isEmpty(genderMap)){
genderMap.forEach((k, v) -> genderDiversity.add(new PieChart(k,v.intValue())));
}
return genderDiversity;
}
public List<PieChart> getDepartmentData(){
List<String> departments = new ArrayList<>();
List<PieChart> departmentData = new ArrayList<>();
for(Employee employee: employees){
departments.add(employee.getDepartment());
}
Map<String, Long> departmentMap =
departments.stream().collect(
Collectors.groupingBy(
Function.identity(), Collectors.counting()
)
);
if(!CollectionUtils.isEmpty(departmentMap)){
departmentMap.forEach((k, v) -> departmentData.add(new PieChart(k,v.intValue())));
}
return departmentData;
}
}
Step 4: Create the CRUD APIs and Chart APIs
Create, read, update and delete(CRUD) APIs are created in EmployeeController.java. Here is the full code:
package com.aj.springbootinmemorydata.controller;

import com.aj.springbootinmemorydata.domain.Employee;
import com.aj.springbootinmemorydata.service.EmployeeService;
import org.slf4j.Logger;
import org.slf4j.LoggerFactory;
import org.springframework.beans.factory.annotation.Autowired;
import org.springframework.http.HttpStatus;
import org.springframework.http.ResponseEntity;
import org.springframework.web.bind.annotation.*;
import org.springframework.web.servlet.support.ServletUriComponentsBuilder;

import java.net.URI;
import java.util.List;

@CrossOrigin(origins = { "http://localhost:3000" })
@RestController
@RequestMapping("/employee")
public class EmployeeController {

    private static final Logger logger = LoggerFactory.getLogger(EmployeeController.class);

    @Autowired
    private EmployeeService employeeService;

    @GetMapping()
    public List<Employee> getAllEmployees() {
        return employeeService.findAll();
    }

    @GetMapping("/{id}")
    public Employee findById(@PathVariable Integer id) {
        return employeeService.findById(id);
    }

    @PostMapping()
    public ResponseEntity<Void> addEmployee(@RequestBody Employee employee) {
        logger.info("Request received in EmployeeController.addEmployee is: {}", employee.toString());
        Employee createdEmployee = employeeService.save(employee);
        URI uri = ServletUriComponentsBuilder.fromCurrentRequest().path("/{id}").buildAndExpand(createdEmployee.getId())
                .toUri();
        return ResponseEntity.created(uri).build();
    }

    @PutMapping()
    public ResponseEntity<Employee> updateEmployee(@RequestBody Employee employee) {
        Employee updatedEmployee = employeeService.save(employee);
        return new ResponseEntity<>(employee, HttpStatus.OK);
    }

    @DeleteMapping("/{id}")
    public ResponseEntity<Void> deleteEmployee(@PathVariable Integer id) {
        Employee employee = employeeService.delete(id);
        if (employee != null) {
            return ResponseEntity.noContent().build();
        }
        return ResponseEntity.notFound().build();
    }
}
Please note: In the code above I have used the annotation: @CrossOrigin to allow the React App, which I would create below, to have access to all the APIs in the class.Chart related APIs to be used by Highcharts are created in ChartController.java. Here is the full code:
package com.aj.springbootinmemorydata.controller;

import com.aj.springbootinmemorydata.domain.PieChart;
import com.aj.springbootinmemorydata.service.EmployeeService;
import org.slf4j.Logger;
import org.slf4j.LoggerFactory;
import org.springframework.beans.factory.annotation.Autowired;
import org.springframework.web.bind.annotation.CrossOrigin;
import org.springframework.web.bind.annotation.GetMapping;
import org.springframework.web.bind.annotation.RequestMapping;
import org.springframework.web.bind.annotation.RestController;

import java.util.List;

@CrossOrigin(origins = { "http://localhost:3000" })
@RestController
@RequestMapping("/chart")
public class ChartController {

    private static final Logger logger = LoggerFactory.getLogger(ChartController.class);

    @Autowired
    private EmployeeService employeeService;

    @GetMapping("/pie/genderDiversity")
    public List<PieChart> getGenderDiversity() {
        logger.info("In ChartController.getGenderDiversity...");
        return employeeService.getGenderDiversity();
    }

    @GetMapping("/pie/department")
    public List<PieChart> getDepartmentData() {
        return employeeService.getDepartmentData();
    }
}
Application 2: React Application with Highcharts Integration
Step 1: Create a new Project
Use React CLI to create a new React project and start the application by executing the commands:
$ create-react-app reactspringboothighcharts
$ cd reactspringboothighcharts
$ npm start
The following libraries are to be added to the app:
- To call the REST APIs - axios
- To display a form - formik
- To support routing - react-router-dom
Here are the commands to add the above libraries:
$ npm add axios
$ npm add formik
$ npm add react-router-dom
React Basics
- React helps us to create complex UIs from small and isolated pieces of code called components.
- React component class should extend base react Component
- JSX is a XML-like syntax. JSX comes with the full power of JavaScript. You can put any JavaScript expressions within braces inside JSX.
- A component takes in parameters, called props (short for “properties”)
- React components implement a render() method that takes input data and returns what to display.
- In addition to taking input data (accessed via this.props), a component can maintain internal state data (accessed via this.state). When a component’s state data changes, the rendered markup will be updated by re-invoking render()
Step 2: Use Bootstrap framework for App CSS
Update src/App.css with the code below:
@import url(https://unpkg.com/bootstrap@4.3.1/dist/css/bootstrap.min.css)
Step 3: Create required Components(jsx) and Services(js)
In the src folder create 2 new folders; component and service
In component folder, create a new file: EmployeeApp.jsx. Here is the full code for this file:
I have used few routing related concepts in this file which will be used in the screen flow later.
Using the last line in the code: export default EmployeeApp, we are making this component available for use in any other component in the App.
Open the file src/App.js and add the code below in it
For calling CRUD APIs related to employee, in service folder, create a new file: EmployeeDataService.js. Here is the full code for this file:
import React, { Component } from 'react';
import ListEmployeesComponent from './ListEmployessComponent';
import EmployeeComponent from './EmployeeComponent';
import { BrowserRouter as Router, Route, Switch } from 'react-router-dom'

class EmployeeApp extends Component {
    render() {
        return (<Router>
            <>
                <h2>Employee Application</h2>
                <Switch>
                    <Route path="/" exact component={ListEmployeesComponent} />
                    <Route path="/employee" exact component={ListEmployeesComponent} />
                    <Route path="/employee/:id" component={EmployeeComponent} />
                </Switch>
            </>
        </Router>
        )
    }
}

export default EmployeeApp
Please Note: I have used few routing related concepts in this file which will be used in the screen flow later.
Using the last line in the code: export default EmployeeApp, we are making this component available for use in any other component in the App.
Open the file src/App.js and add the code below in it
import React, { Component } from 'react';
import './App.css';
import EmployeeApp from './component/EmployeeApp'

class App extends Component {
  render() {
    return (
      <div className="container">
        <EmployeeApp />
      </div>
    );
  }
}

export default App;
All code related to calling APIs in Spring Boot Application is written in the js files in the service folder. We use a library called axios to call the REST APIs.For calling CRUD APIs related to employee, in service folder, create a new file: EmployeeDataService.js. Here is the full code for this file:
import axios from 'axios'

const EMPLOYEE_API_URL = 'http://localhost:4000/employee'

class EmployeeDataService {

    getAllEmployees() {
        return axios.get(`${EMPLOYEE_API_URL}`);
    }

    deleteEmployee(id) {
        return axios.delete(`${EMPLOYEE_API_URL}/${id}`);
    }

    getEmployeeById(id) {
        return axios.get(`${EMPLOYEE_API_URL}/${id}`);
    }

    updateEmployee(employee) {
        return axios.put(`${EMPLOYEE_API_URL}`, employee);
    }

    createEmployee(employee) {
        return axios.post(`${EMPLOYEE_API_URL}`, employee);
    }
}

export default new EmployeeDataService()
For APIs to be used for Pie charts in Highcharts, in service folder, create a new file: ChartDataService.js. Here is the full code for this file:import axios from 'axios'
const CHART_API_URL = 'http://localhost:4000/chart'
class ChartDataService {
getGenderDiversity() {
return axios.get(`${CHART_API_URL}/pie/genderDiversity`);
}
getDepartment() {
return axios.get(`${CHART_API_URL}/pie/department`);
}
}
export default new ChartDataService()
Two more components need to be created as below:- ListEmployeesComponent: For the App landing page, which will be used to display all the employees and the charts related to the employee details
- EmployeeComponent: For the page to Add employee and Update employee details.
Here is the full code for ListEmployeesComponent.jsx:
import React, { Component } from 'react';
import EmployeeDataService from '../service/EmployeeDataService'
import ChartDataService from '../service/ChartDataService';
import Highcharts from "highcharts";
import HighchartsReact from "highcharts-react-official";

class ListEmployeesComponent extends Component {

    constructor(props) {
        super(props)
        this.state = {
            employees: [],
            genderData: [],
            departmentData: [],
            message: null
        }
        this.refreshEmployees = this.refreshEmployees.bind(this)
        this.updateEmployeeClicked = this.updateEmployeeClicked.bind(this)
        this.addEmployeeClicked = this.addEmployeeClicked.bind(this)
        this.deleteEmployeeClicked = this.deleteEmployeeClicked.bind(this)
        this.getGenderDiversity = this.getGenderDiversity.bind(this)
        this.getDepartment = this.getDepartment.bind(this)
    }

    componentDidMount() {
        this.refreshEmployees();
        this.getGenderDiversity();
        this.getDepartment();
    }

    refreshEmployees() {
        EmployeeDataService.getAllEmployees()
            .then(
                response => {
                    console.log(response);
                    this.setState({ employees: response.data })
                }
            )
    }

    getGenderDiversity() {
        ChartDataService.getGenderDiversity()
            .then(
                response => {
                    console.log(response);
                    this.setState({ genderData: response.data })
                }
            )
    }

    getDepartment() {
        ChartDataService.getDepartment()
            .then(
                response => {
                    console.log(response);
                    this.setState({ departmentData: response.data })
                }
            )
    }

    deleteEmployeeClicked(id) {
        EmployeeDataService.deleteEmployee(id)
            .then(
                response => {
                    this.setState({ message: `Delete of Employee with ID: ${id} is successful` })
                    this.refreshEmployees()
                    this.getGenderDiversity()
                    this.getDepartment()
                }
            )

    }

    updateEmployeeClicked(id) {
        console.log('update ' + id)
        this.props.history.push(`/employee/${id}`)
    }

    addEmployeeClicked() {
        this.props.history.push(`/employee/-1`)
    }

    render() {
        const options = {
            chart: {
              type: "pie"
            },
            title: {
              text: "Gender Diversity"
            },
            series: [
              {
                data: this.state.genderData
              }
            ]
          };

          const options1 = {
            chart: {
              type: "pie"
            },
            title: {
              text: "Department"
            },
            series: [
              {
                data: this.state.departmentData
              }
            ]
          };

          const containerStyle = {
            display: "flex",
            width: "100%",
            height: "350px"
          };

          const chartStyle = {
            width: "50%"
          };
        return (
            <div className="container">
                <h4>All Employees</h4>
                {this.state.message && <div class="alert alert-success">{this.state.message}</div>}
                <div className="container">
                    <table className="table">
                        <thead>
                            <tr>
                                <th>ID</th>
                                <th>Name</th>
                                <th>Department</th>
                                <th>Salary</th>
                                <th>Gender</th>
                                <th>Update</th>
                                <th>Delete</th>
                            </tr>
                        </thead>
                        <tbody>
                        {
                                this.state.employees.map(
                                    employee =>
                                        <tr key={employee.id}>
                                            <td>{employee.id}</td>
                                            <td>{employee.name}</td>
                                            <td>{employee.department}</td>
                                            <td>{employee.salary}</td>
                                            <td>{employee.gender}</td>
                                            <td><button className="btn btn-primary" onClick={() => this.updateEmployeeClicked(employee.id)}>Update</button></td>
                                            <td><button className="btn btn-danger" onClick={() => this.deleteEmployeeClicked(employee.id)}>Delete</button></td>
                                        </tr>
                                )
                            }
                        </tbody>
                    </table>
                </div>
                <div className="row">
                <button className="btn btn-info" onClick={this.addEmployeeClicked}>Add</button>
                </div>
                <div className="container1" style = {containerStyle}>
                <div className="chart" style={chartStyle}>
                <HighchartsReact highcharts={Highcharts} options={options} />
                </div>
                <div className="chart1" style={chartStyle}>
                <HighchartsReact highcharts={Highcharts} options={options1} />
                </div>
                </div>
                <br></br>
                <br></br>
                <br></br>
                <div>
                <p align="center"><b>#SoftwareDeveloperCentral @AjTechDeveloper</b></p>
                </div>
            </div>
        )
    }
}

export default ListEmployeesComponent
Please Note: The most popular form framework with React is formik.
In EmployeeComponent, we use formik to create a simple form and add a very simple form validation to it. Here is the full code for EmployeeComponent.jsx:
In EmployeeComponent, we use formik to create a simple form and add a very simple form validation to it. Here is the full code for EmployeeComponent.jsx:
import React, { Component } from 'react';
import EmployeeDataService from '../service/EmployeeDataService';
import { Formik, Form, Field, ErrorMessage } from 'formik';

class EmployeeComponent extends Component {
    constructor(props) {
        super(props)

        this.state = {
            id: this.props.match.params.id,
            name: ''
        }

        this.onSubmit = this.onSubmit.bind(this)
        this.validate = this.validate.bind(this)
    }

    componentDidMount() {

        console.log(this.state.id)

        if (this.state.id === -1) {
            return
        }

        EmployeeDataService.getEmployeeById(this.state.id)
            .then(response => this.setState({
                name: response.data.name,
                department: response.data.department,
                salary: response.data.salary,
                gender: response.data.gender
            }))
    }

    validate(values) {
        let errors = {}
        if (!values.name) {
            errors.name = 'Enter a Name'
        }
        return errors

    }

    onSubmit(values) {

        let employee = {
            id: this.state.id,
            name: values.name,
            department: values.department,
            salary: values.salary,
            gender: values.gender
        }

        if (this.state.id === -1) {
            EmployeeDataService.createEmployee(employee)
                .then(() => this.props.history.push('/employee'))
        } else {
            EmployeeDataService.updateEmployee(employee)
                .then(() => this.props.history.push('/employee'))
        }

        console.log(values);
    }

    render() {

        let { gender, salary, department, name, id } = this.state

        return (
            <div>
                <h4>Employee</h4>
                <div className="container">
                <Formik
                    initialValues={{ id, name, department, salary, gender }}
                    onSubmit={this.onSubmit}
                    validateOnChange={false}
                    validateOnBlur={false}
                    validate={this.validate}
                    enableReinitialize={true}
                >
                    {
                        (props) => (
                            <Form>
                                <ErrorMessage name="name" component="div"
                                        className="alert alert-warning" />
                                <fieldset className="form-group">
                                    <label>Id</label>
                                    <Field className="form-control" type="text" name="id" disabled />
                                </fieldset>
                                <fieldset className="form-group">
                                    <label>Name</label>
                                    <Field className="form-control" type="text" name="name" />
                                </fieldset>
                                <fieldset className="form-group">
                                    <label>Department</label>
                                    <Field className="form-control" type="text" name="department" />
                                </fieldset>
                                <fieldset className="form-group">
                                    <label>Salary</label>
                                    <Field className="form-control" type="text" name="salary" />
                                </fieldset>
                                <fieldset className="form-group">
                                    <label>Gender</label>
                                    <Field className="form-control" type="text" name="gender" />
                                </fieldset>
                                <button className="btn btn-info" type="submit">Save</button>
                            </Form>
                        )
                    }
                </Formik>
            </div>
            <br></br>
            <p align="center"><b>#SoftwareDeveloperCentral @AjTechDeveloper</b></p>
            </div>
        )
    }

}

export default EmployeeComponent
Project Setup:
For Java Setup, please refer to: Java Setup
For Maven Setup, please refer to: Maven Setup
For Git and Project Setup, please refer to: Git and Project Setup
For Maven Setup, please refer to: Maven Setup
For Git and Project Setup, please refer to: Git and Project Setup
Run Application:
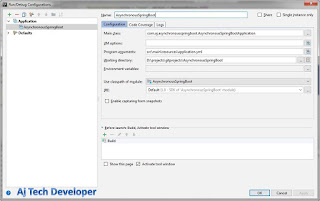
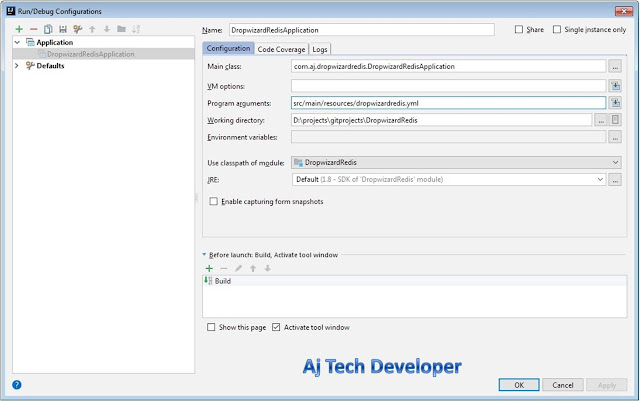
1. To run the Spring Boot application in your IDE use:Program arguments: src/main/resources/application.yml

Build jar by using command:
mvn clean install
Run JAR in the Project folder location by using the command :
java -jar target\SpringBootInMemoryData-1.0.0.jar src\main\resources\application.yml
Please note: I have set the server port as 4000 in application.yml
3. To test the APIs present in the Spring Boot Application use Swagger UI. I am assuming that you have a basic knowledge of Swagger API documentation. If not, please check my blog post on Swagger by going to the link: Spring Boot REST API Documentation With Swagger
Open Swagger UI using the URL: http://localhost:4000/swagger-ui.html

4. In the React project folder location run the command:
$ npm startOpen the URL: http://localhost:3000/

In the UI, click the Add or Update button

Conclusion and GitHub link:
In this post I have given you a comprehensive overview of the integration of React, Highcharts and Spring Boot. The Spring Boot Application code used in this post is available on GitHub and the React App code used in this post is also available on GitHub.
Learn the most popular and trending technologies like Blockchain, Cryptocurrency, Machine Learning, Chatbots, Internet of Things (IoT), Big Data Processing, Elastic Stack, React, Progressive Web Application (PWA), Angular 5, GraphQL, Akka HTTP, Play Framework, Dropwizard, Docker, Netflix Eureka, Netflix Zuul, Spring Cloud, Spring Boot, Flask and RESTful Web Service integration with MongoDB, Kafka, Redis, Aerospike, MySQL DB in simple steps by reading my most popular blog posts at Software Developer Central.
If you like my post, please feel free to share it using the share button just below this paragraph or next to the heading of the post. You can also tweet with #SoftwareDeveloperCentral on Twitter. To get a notification on my latest posts or to keep the conversation going, you can follow me on Twitter or Instagram. Please leave a note below if you have any questions or comments.
Comments
Post a Comment