Angular 5 Tutorial
Angular 5 Tutorial
Introduction
AngularJS is one of most popular and most used web application framework today. In this tutorial, I will be giving an overview of Angular 5 from scratch. There is no requirement for you to have any prior experience in developing AngularJS applications.
AngularJS
AngularJS is a structural framework for dynamic web applications. It lets you use HTML as your template language and lets you extend HTML's syntax to express your application's components clearly. Read more about AngularJS from: AngularJS Website.
Angular 5
Angular 5 continues on the same architecture that was started from Angular 2. The architecture is based on service/controller. It is built on TypeScript which is a superset of JavaScript which helps to build more robust and structured code. TypeScript is a form of JavaScript which knows types and classes and can be compiled to JavaScript. It is open source. TypeScript includes many aspects of object orientation such as inheritance and interfaces. It also has generics and lambdas.
As started from Angular 2, Angular 5 also has the same component based UI. This helps a developer to divide the applications in terms of components with desired features and enable to call required UI. These have helped to improve the flexibility and reusability as compared to Angular v1.0. There is improved dependency injection model also and so there are more opportunities for component and object-based work.
Requirements to Run the Application:
- Node.js
- Node Package Manager (NPM)
- Angular CLI
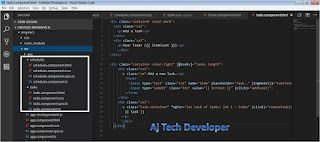
- Visual Studio Code or any IDE that supports working on UI code.
Node.js, NPM and Angular CLI should be setup and running in your machine. To setup, run and test if all these are working fine, please refer to my post on: Nodejs and Angular CLI Setup.
I prefer using Visual Studio Code for working on the UI code. It can be downloaded from Microsoft Visual Studio Code Website.
To get to know more about Visual Studio Code, you can read: Getting Started on Visual Studio Code.
I prefer using Visual Studio Code for working on the UI code. It can be downloaded from Microsoft Visual Studio Code Website.
To get to know more about Visual Studio Code, you can read: Getting Started on Visual Studio Code.
If you prefer using any other tool for working on the UI code, you can go ahead and use it.
In this post, I am building a simple UI for a Personal Assistant App which can be used to manage your Tasks and Schedules. To keep things simple, I am storing all data in memory in simple lists. Once you have the initial setup mentioned above, you can build the application in few simple steps.
Step 1: Create a new Project
I am naming my project as Angular5. Here is the command to create it using Angular CLI:
ng new Angular5 --style=scss --routing
While creating a new project, we are adding two flags at the end:
--style=scss specifies that we want the CSS to use the sass compiler.
--routing specifies the CLI to provide us with the basic structure for routing.
Now to run your project, use the following commands:
ng serve will automatically compile any new changes in UI code on save and reload the browser with the new changes.
Component level CSS styling can be defined at the component level .scss file. In this post that would mean: tasks.component.scss and schedules.component.scss
Open up /src/app/tasks/tasks.component.scss and paste the following code:
1. Add @Injectable() decorator so that it can be imported it into other components and its properties and methods can be accessed. This is achieved using the following code:
2. To share data between components we use the Rxjs BehaviorSubject library. To set this up and use it in the application we use the code below:
3. As I said initially, all data for this application is stored in memory. So I am initializing 2 lists: tasks and schedules for the 2 pages I am creating and this is done here in the service and called in the respective pages. I will show how it is called in the pages a little later in this tutorial. Both the lists are set as BehaviorSubject and I am defining property task and schedule as observable. Also I am creating changeTask and changeSchedule methods that we will call to update the tasks and schedules property respectively. I will show the usage of changeTask and changeSchedule methods a little later in this tutorial. Here is the code for this:
Open up the file: /src/app/tasks/tasks.component.ts and update the code with the following:
ngOnInit which has logic for OnInit action.
addTask which has logic when a task is added.
removeTask which has logic when a task is removed.
Open up /src/app/tasks/tasks.component.html and replace the code with the following:
1. Interpolation: When we need to pass on variable, arrays, objects etc.. from the component class to the template, then we use Interpolation. The format used for interpolation is {{ propertyName }}
An example for this in the HTML code above is:
2. Property Binding: When we need the component class to control the values of buttons used on the HTML page, then we use Property Binding. An example for this in the HTML code above is in [value]="btnText":
3. Two-Way Data Binding: When we need the input textfield to both retrieve and set its value from a component class, then we use Two-Way Data Binding. We use ngModel to create that two-way data binding. In the file /src/app/app.module.ts, we have to import the FormsModule in order to have access to ngModule. Then include it under @NgModule().
If you observe the code above under Step 4: Create Services for /src/app/app.module.ts, this is already done.
An example for this in the HTML code above is:
4. Event Binding: When we need to capture a variety of user-initiated events to initiate logic in our component class, then we use Event Binding. To show how this is done, I am defining click event on the Add Task button. Here is the code used in the HTML file above:
5. ngFor: To display any array element on the HTML we can use ngFor. An example for this in the HTML code above is:
Open up the file: /src/app/tasks/tasks.component.ts and update the code with the following:
 With the animation added, you should see each of the 2 task items animate in a unique stagger. Then add a task yourself with the form, and you will see it too animates in as expected. Click on a Task Item and it will be deleted from the Tasks list. Also observe that the count in Your Tasks gets updated as per addition or deletion.
is placed.
Open up the file: /src/app/app.component.html and update the code with the following:
Get and Set Route Parameters in Angular 5
Open up the file: /src/app/app-routing.module.ts and update the code with the following:
Open up the file: /src/app/app.component.html and update the code with the following:
To view the value on the page, import ActivatedRoute and then create an instance of ActivatedRoute through dependency injection in the constructor of the class and use it. Here is the code used in: /src/app/schedules/schedules.component.ts
schedules.component.ts also has logic similar to tasks.component.ts, but there is some extra code. Hence here is its full code. So open up the file: /src/app/schedules/schedules.component.ts and update the code with the following:
Component Router Navigation
This is used to route the page based on a logic occurring in the component class. If you observe the code for /src/app/schedules/schedules.component.ts, this is done importing Router and then create an instance of Router through dependency injection in the constructor of the class and use it.
Here is the code used in: /src/app/schedules/schedules.component.ts
Finally open up /src/app/schedules/schedules.component.html and replace the code with the following:
One last thing to observe in /src/app/schedules/schedules.component.ts is that I am using the service that I created in Step 4 to subscribe to Tasks data in the Schedules Component and I am displaying the Tasks data on the Schedules page. The code is used in ngOnInit() as: this._information.task.subscribe(res => this.tasks = res);
Here is the corresponding block of code

Here are the steps to do this:
1. Install CLI tool globally using the command
--base-href flag. Here is the command that I have used as per my GitHub Account username and the Project Name that I have used in GitHub for this app
--style=scss specifies that we want the CSS to use the sass compiler.
--routing specifies the CLI to provide us with the basic structure for routing.
Now to run your project, use the following commands:
$ cd Angular5
$ ng serve
The application can be accessed using rhe URL: http://localhost:4200. The HTML that comes up is the /src/app/app.component.html. I will give more details about this HTML in the Step 2.
ng serve will automatically compile any new changes in UI code on save and reload the browser with the new changes.
Step 2: Create Components
Components are the main way we build and specify elements and logic on the page. They can be visualized as basic building blocks of your application.
When the new project is created , the Angular CLI will by default generate the App level component files. These files are the /src/app/app.component files:
.html file: This is what is displayed on the UI.
.scss file: CSS file for the component which is used for styling.
.spec.ts file: The spec files are unit tests for your source files. The convention from Angular2 applications is to have a .spec.ts file for each .ts file.
.ts file: A class where the component logic is stored.
In my application, I have 2 sections, one for Tasks and the other for Schedules. Hence I will be creating 2 components. Here are the commands used to create them:
When the new project is created , the Angular CLI will by default generate the App level component files. These files are the /src/app/app.component files:
- app.component.html
- app.component.scss
- app.component.spec.ts
- app.component.ts
.html file: This is what is displayed on the UI.
.scss file: CSS file for the component which is used for styling.
.spec.ts file: The spec files are unit tests for your source files. The convention from Angular2 applications is to have a .spec.ts file for each .ts file.
.ts file: A class where the component logic is stored.
In my application, I have 2 sections, one for Tasks and the other for Schedules. Hence I will be creating 2 components. Here are the commands used to create them:
$ ng generate component tasks
$ ng g c schedules
See how in the second command, I am using short forms; g c in place of generate component. Both the commands perform the same task to generate component. Components are generated in the folder: /src/app

As mentioned above, if you observe, in each of the components: tasks and schedules, by default 4 files are created:
.html file, .scss file, .spec.ts file and .ts file.
.html file, .scss file, .spec.ts file and .ts file.
Component Nesting
We will nest the tasks and schedules components into the base app component. In /src/app/app.component.html, delete all the existing code and replace it with the code:
<ul>
  <li><a routerLink="tasks">Tasks</a></li>
  <li><a routerLink="schedules">Schedules</a></li>
</ul>

<app-home></app-home>
Now check your browser at http://localhost:4200 and you will see a page with: tasks works!
This is as per the CLI generated HTML page for tasks component. You can check the HTML: tasks.component.html for the code.
Step 3: Create the required Styling
Application level or global CSS styling can be defined in the file: /src/styles.scss. So open up /src/styles.scss and paste the following code:
@import url('https://fonts.googleapis.com/css?family=Merriweather:300,700');

body {
    background:#CE42E0;
    padding: 3em;
    font-family: 'Merriweather', 'Arial';
    color:#fff;
}
ul {
    list-style-type:none;
    margin:0 0 2em 0;
    padding:0;
}
ul li {
    display:inline;
    margin-right: 30px;
}
ul li a {
    font-size: 1.5em;
}
a {
    color:#fff;
    text-decoration:none;
}
Here I am importing and using font family: Merriweather from: Google Fonts. You can use this or choose your own. Here is the code for this import:
@import url('https://fonts.googleapis.com/css?family=Merriweather:300,700');
The rest of the code is plain CSS related code.Component level CSS styling can be defined at the component level .scss file. In this post that would mean: tasks.component.scss and schedules.component.scss
Open up /src/app/tasks/tasks.component.scss and paste the following code:
.container {
    display: grid;
    grid-template-columns: 50% auto;
}
.col {
    padding: .4em 1.3em;
}
.color-dark {
    background: #802CC4;
}
.color-light {
    background: #C557F1;
}

input.txt {
    border: 0;
    padding: 1em;
    width: 80%;
    margin-bottom: 2em;
}
input.btn {
    border: 0;
    display:block;
    padding:1em 3em;
    background:#F883C7;
    color:#003A61;
    margin-bottom:1em;
    cursor:pointer;
}
.task-container {
    background:#A63FE1;
    padding:.5em;
    font-weight:bold;
    cursor:pointer;
}
Open up /src/app/schedules/schedules.component.scss and paste the following code:.container {
display: grid;
grid-template-columns: 50% auto;
}
.col {
padding: .4em 1.3em;
}
.color-dark {
background: #802CC4;
}
.color-light {
background: #C557F1;
}
input.txt {
border: 0;
padding: 1em;
width: 80%;
margin-bottom: 2em;
}
input.btn {
border: 0;
display:block;
padding:1em 3em;
background:#F883C7;
color:#003A61;
margin-bottom:1em;
cursor:pointer;
}
.schedule-container {
background:#A63FE1;
padding:.5em;
font-weight:bold;
cursor:pointer;
}
.normal-container {
background:#A63FE1;
padding:.5em;
font-weight:bold;
cursor:default;
}
Step 4: Create Services
Services are mainly used for storing data and making HTTP calls. In our project, let's create a service named as information that will allow us to share the data between our two components.
Here are the Angular CLI command used to create it:
$ ng generate service informationOr in short form:
$ ng g s informationOpen the file: /src/app/information.service.ts and update it with the following:
import { Injectable } from '@angular/core';
import { BehaviorSubject } from 'rxjs/BehaviorSubject';

@Injectable()
export class InformationService {

  private tasks = new BehaviorSubject<any>(['The first task', 'Another task']);
  task = this.tasks.asObservable();

  private schedules = new BehaviorSubject<any>(['The first schedule', 'Another schedule']);
  schedule = this.schedules.asObservable();

  constructor() { }

  changeTask(task) {
    this.tasks.next(task)
  }

  changeSchedule(schedule) {
    this.schedules.next(schedule)
  }

}
Here is the explanation for the code in information.service.ts:1. Add @Injectable() decorator so that it can be imported it into other components and its properties and methods can be accessed. This is achieved using the following code:
import { Injectable } from '@angular/core';
@Injectable()
export class InformationService {
2. To share data between components we use the Rxjs BehaviorSubject library. To set this up and use it in the application we use the code below:
import { BehaviorSubject } from 'rxjs/BehaviorSubject';
private tasks = new BehaviorSubject<any>(['The first task', 'Another task']);
private schedules = new BehaviorSubject<any>(['The first schedule', 'Another schedule']);
3. As I said initially, all data for this application is stored in memory. So I am initializing 2 lists: tasks and schedules for the 2 pages I am creating and this is done here in the service and called in the respective pages. I will show how it is called in the pages a little later in this tutorial. Both the lists are set as BehaviorSubject and I am defining property task and schedule as observable. Also I am creating changeTask and changeSchedule methods that we will call to update the tasks and schedules property respectively. I will show the usage of changeTask and changeSchedule methods a little later in this tutorial. Here is the code for this:
private tasks = new BehaviorSubject<any>(['The first task', 'Another task']);
  task = this.tasks.asObservable();

private schedules = new BehaviorSubject<any>(['The first schedule', 'Another schedule']);
  schedule = this.schedules.asObservable();

changeTask(task) {
    this.tasks.next(task)
  }

changeSchedule(schedule) {
    this.schedules.next(schedule)
  }
Import the New Service
Whenever a new service is created, it has to be added to the array: providers in: /src/app/app.module.ts. Here is the code to do it:
import { InformationService } from './information.service';

@NgModule({
  ...
  providers: [InformationService],
  ...
})
For now you can open up the file /src/app/app.module.ts and update it with the following code:import { BrowserModule } from '@angular/platform-browser';
import { NgModule } from '@angular/core';
import { AppRoutingModule } from './app-routing.module';
import { AppComponent } from './app.component';
import { TasksComponent } from './tasks/tasks.component';
import { SchedulesComponent } from './schedules/schedules.component';
import { FormsModule } from '@angular/forms';
import { InformationService } from './information.service';
@NgModule({
declarations: [
AppComponent,
TasksComponent,
SchedulesComponent
],
imports: [
BrowserModule,
AppRoutingModule,
FormsModule
],
providers: [InformationService],
bootstrap: [AppComponent]
})
export class AppModule { }
The code here is pretty self explanatory. app.module.ts has the metadata information about the application, its components and its services. It has @NgModule() decorator. @NgModule simplifies the way you define and manage dependencies in your Angular apps.Use the New Service in the Components
In /src/app/tasks/tasks.component.ts file, import the service and add it in the constructor using dependency injection. Here is the code for this:
//Showing only related code for better understanding
import { InformationService } from '../information.service';

export class TasksComponent implements OnInit {

constructor(private _information: InformationService) { }
}
The same applies for /src/app/schedules/schedules.component.tsOpen up the file: /src/app/tasks/tasks.component.ts and update the code with the following:
import { Component, OnInit } from '@angular/core';
import { InformationService } from '../information.service';

@Component({
  selector: 'app-tasks',
  templateUrl: './tasks.component.html',
  styleUrls: ['./tasks.component.scss'],
  animations: []
})
export class TasksComponent implements OnInit {


    itemCount: number = 4;
    btnText: string = 'Add Task';
    taskText: string = 'A task';
    tasks = [];

    constructor(private _information: InformationService) { }

    ngOnInit() {
      this._information.task.subscribe(res => this.tasks = res);
      this.itemCount = this.tasks.length;
      this._information.changeTask(this.tasks);
    }

    addTask() {
      this.tasks.push(this.taskText);
      this.taskText = '';
      this.itemCount = this.tasks.length;
      this._information.changeTask(this.tasks);
    }

    removeTask(i) {
      this.tasks.splice(i, 1);
      this.taskText = '';
      this.itemCount = this.tasks.length;
      this._information.changeTask(this.tasks);
    }

}
As mentioned earlier, the logic for the component resides in the respective component.ts file. So here we are using the service injected through dependency injection and creating 3 methods:ngOnInit which has logic for OnInit action.
addTask which has logic when a task is added.
removeTask which has logic when a task is removed.
Step 5: Templating, Interpolation, Property Binding & Event Binding
Check: /src/app/tasks/tasks.component.ts, it will have code as below:
@Component({
  selector: 'app-tasks',
  templateUrl: './tasks.component.html',
  styleUrls: ['./tasks.component.scss']
})
The templateUrl specifies the template for this component and it points to the tasks.component.html file. So Template for a component is its corresponding HTML file. So template for Tasks Component is /src/app/tasks/tasks.component.html and for Schedules it would be /src/app/schedules/schedules.component.html.Open up /src/app/tasks/tasks.component.html and replace the code with the following:
<div class="container color-dark">
  <div class="col">
    <p>Add a Task</p>
  </div>
  <div class="col">
    <p>Your Tasks ({{ itemCount }})</p>
    </div>
</div>

<div class="container color-light" [@tasks]="tasks.length">
    <div class="col">
      <p class="sm">Add a new Task.</p>
        <form>
          <input type="text" class="txt" name="item" placeholder="Task.." [(ngModel)]="taskText">
          <input type="submit" class="btn" [value]="btnText" (click)="addTask()">
        </form>
    </div>
    <div class="col">
      <p class="task-container" *ngFor="let task of tasks; let i = index" (click)="removeTask(i)">
        {{ task }}
      </p>
      </div>
  </div>
Here are a few concepts that are shown in this file:1. Interpolation: When we need to pass on variable, arrays, objects etc.. from the component class to the template, then we use Interpolation. The format used for interpolation is {{ propertyName }}
An example for this in the HTML code above is:
<p>Your Tasks ({{ itemCount }})</p>
If you check /src/app/tasks/tasks.component.ts, I have declared itemCount as:export class TasksComponent implements OnInit {
itemCount: number = 4;
}
2. Property Binding: When we need the component class to control the values of buttons used on the HTML page, then we use Property Binding. An example for this in the HTML code above is in [value]="btnText":
<input type="submit" class="btn" [value]="btnText" (click)="addTask()">If you check /src/app/tasks/tasks.component.ts, I have declared btnText as:
export class TasksComponent implements OnInit {

    btnText: string = 'Add Task';

}
3. Two-Way Data Binding: When we need the input textfield to both retrieve and set its value from a component class, then we use Two-Way Data Binding. We use ngModel to create that two-way data binding. In the file /src/app/app.module.ts, we have to import the FormsModule in order to have access to ngModule. Then include it under @NgModule().
If you observe the code above under Step 4: Create Services for /src/app/app.module.ts, this is already done.
An example for this in the HTML code above is:
<input type="text" class="txt" name="item" placeholder="Task.." [(ngModel)]="taskText">If you check /src/app/tasks/tasks.component.ts, I have declared taskText as:
export class TasksComponent implements OnInit {

    taskText: string = 'A task';

}
4. Event Binding: When we need to capture a variety of user-initiated events to initiate logic in our component class, then we use Event Binding. To show how this is done, I am defining click event on the Add Task button. Here is the code used in the HTML file above:
<input type="submit" class="btn" [value]="btnText" (click)="addTask()">If you check /src/app/tasks/tasks.component.ts, I have added logic for addTask(), ngOnInit() and a few other changes:
export class TasksComponent implements OnInit {

    ngOnInit() {
      this._information.task.subscribe(res => this.tasks = res);
      this.itemCount = this.tasks.length;
      this._information.changeTask(this.tasks);
    }

    addTask() {
      this.tasks.push(this.taskText);
      this.taskText = '';
      this.itemCount = this.tasks.length;
      this._information.changeTask(this.tasks);
    }

}
5. ngFor: To display any array element on the HTML we can use ngFor. An example for this in the HTML code above is:
<p class="task-container" *ngFor="let task of tasks; let i = index" (click)="removeTask(i)">
        {{ task }}
      </p>
If you observe here, other than the ngFor, I am also defining a click event to Remove Task. So when you click on a task it will be removed froom the list. If you check /src/app/tasks/tasks.component.ts, I have added logic for removeTask(i):export class TasksComponent implements OnInit {
removeTask(i) {
this.tasks.splice(i, 1);
this.taskText = '';
this.itemCount = this.tasks.length;
this._information.changeTask(this.tasks);
}
}
Step 6: Add required Animation
To install the Animation Library, you will require Administrator privilege on your machine. With the option Run as administrator, open a new Command Prompt and execute the following command:
npm install @angular/animations@latest --saveImport it into /src/app/app.module.ts
import { BrowserAnimationsModule } from '@angular/platform-browser/animations';

@NgModule({
  ...
  imports: [

    BrowserAnimationsModule
  ],
})
So now here is the full file /src/app/app.module.ts for your reference:
import { BrowserModule } from '@angular/platform-browser';
import { NgModule } from '@angular/core';

import { AppRoutingModule } from './app-routing.module';

import { AppComponent } from './app.component';
import { TasksComponent } from './tasks/tasks.component';
import { SchedulesComponent } from './schedules/schedules.component';
import { FormsModule } from '@angular/forms';
import { BrowserAnimationsModule } from '@angular/platform-browser/animations';
import { InformationService } from './information.service';


@NgModule({
  declarations: [
    AppComponent,
    TasksComponent,
    SchedulesComponent
  ],
  imports: [
    BrowserModule,
    AppRoutingModule,
    FormsModule,
    BrowserAnimationsModule
  ],
  providers: [InformationService],
  bootstrap: [AppComponent]
})
export class AppModule { }
Then import and define animations in the component classimport { trigger,style,transition,animate,keyframes,query,stagger } from '@angular/animations';
@Component({
selector: 'app-tasks',
templateUrl: './tasks.component.html',
styleUrls: ['./tasks.component.scss'],
animations: [
// Add animations here
]
})
I am adding some basic query for :enter, :leave and animations ease-in and ease-out.Open up the file: /src/app/tasks/tasks.component.ts and update the code with the following:
import { Component, OnInit } from '@angular/core';
import { trigger,style,transition,animate,keyframes,query,stagger } from '@angular/animations';
import { InformationService } from '../information.service';

@Component({
  selector: 'app-tasks',
  templateUrl: './tasks.component.html',
  styleUrls: ['./tasks.component.scss'],
  animations: [

        trigger('tasks', [
          transition('* => *', [

            query(':enter', style({ opacity: 0 }), {optional: true}),

            query(':enter', stagger('250ms', [
              animate('.5s ease-in', keyframes([
                style({opacity: 0, transform: 'translateY(-75%)', offset: 0}),
                style({opacity: .5, transform: 'translateY(35px)',  offset: 0.3}),
                style({opacity: 1, transform: 'translateY(0)',     offset: 1.0}),
              ]))]), {optional: true}),

            query(':leave', stagger('250ms', [
              animate('.5s ease-out', keyframes([
                style({opacity: 1, transform: 'translateY(0)', offset: 0}),
                style({opacity: .5, transform: 'translateY(35px)',  offset: 0.3}),
                style({opacity: 0, transform: 'translateY(-75%)',     offset: 1.0}),
              ]))]), {optional: true})
          ])
        ])

      ]
})
export class TasksComponent implements OnInit {


    itemCount: number = 4;
    btnText: string = 'Add Task';
    taskText: string = 'A task';
    tasks = [];

    constructor(private _information: InformationService) { }

    ngOnInit() {
      this._information.task.subscribe(res => this.tasks = res);
      this.itemCount = this.tasks.length;
      this._information.changeTask(this.tasks);
    }

    addTask() {
      this.tasks.push(this.taskText);
      this.taskText = '';
      this.itemCount = this.tasks.length;
      this._information.changeTask(this.tasks);
    }

    removeTask(i) {
      this.tasks.splice(i, 1);
      this.taskText = '';
      this.itemCount = this.tasks.length;
      this._information.changeTask(this.tasks);
    }

}
To apply the animation to the template, we use the following code in the HTML. This is already present in the HTML code used in Step 5 above.<div class="container color-light" [@tasks]="tasks.length">With all these changes done, the UI will look as below:

Step 7: Routing
The App Routing file is /src/app/app-routing.module.ts. This file takes care of page navigations like on load which page come up, which page to go when a link is clicked. Now add the new components that we created as imports and update the code in this file as below:
import { NgModule } from '@angular/core';
import { Routes, RouterModule } from '@angular/router';
import { TasksComponent } from './tasks/tasks.component';
import { SchedulesComponent } from './schedules/schedules.component';

const routes: Routes = [
  {
    path: '',
    component: TasksComponent
  },
  {
    path: 'schedules',
    component: SchedulesComponent
  }
];

@NgModule({
  imports: [RouterModule.forRoot(routes)],
  exports: [RouterModule]
})
export class AppRoutingModule { }
This will set the default path when the application loads to show the TaskComponent wherever the Open up the file: /src/app/app.component.html and update the code with the following:
<ul>
  <li><a routerLink="">Tasks</a></li>
  <li><a routerLink="schedules">Schedules</a></li>
</ul>

<router-outlet></router-outlet>
Now, go to the browser and click back and forth between our two navigation links: Tasks and Schedules and it will display the appropriate components.
Get and Set Route Parameters in Angular 5
Open up the file: /src/app/app-routing.module.ts and update the code with the following:
import { NgModule } from '@angular/core';
import { Routes, RouterModule } from '@angular/router';
import { TasksComponent } from './tasks/tasks.component';
import { SchedulesComponent } from './schedules/schedules.component';

const routes: Routes = [
  {
    path: '',
    component: TasksComponent
  },
  {
    path: 'schedules/:id',
    component: SchedulesComponent
  }
];

@NgModule({
  imports: [RouterModule.forRoot(routes)],
  exports: [RouterModule]
})
export class AppRoutingModule { }
Observe how I am using: path: 'schedules/:id'. Multiple parameters can also be created as: schedules/:id/:name/:parameter.Open up the file: /src/app/app.component.html and update the code with the following:
<ul>
  <li><a routerLink="">Tasks</a></li>
  <li><a routerLink="schedules/101">Schedules</a></li>
</ul>

<router-outlet></router-outlet>
Observe how I am adding a random value to id here as 101. In a real world application this id would correspond to a value retrieved from a Database or another service.
To view the value on the page, import ActivatedRoute and then create an instance of ActivatedRoute through dependency injection in the constructor of the class and use it. Here is the code used in: /src/app/schedules/schedules.component.ts
import { ActivatedRoute } from '@angular/router';

export class SchedulesComponent implements OnInit {
constructor(private route: ActivatedRoute,private router: Router, private _information: InformationService) {
    this.route.params.subscribe(res => console.log(res.id));
  }

ngOnInit() {
    this._information.schedule.subscribe(res => this.schedules = res);
    this.itemCount = this.schedules.length;
    this._information.changeSchedule(this.schedules);
    this._information.task.subscribe(res => this.tasks = res);
    this.route.params.subscribe(res => this.memberId = res.id);
  }
}
I am printing the route parameter in the console.schedules.component.ts also has logic similar to tasks.component.ts, but there is some extra code. Hence here is its full code. So open up the file: /src/app/schedules/schedules.component.ts and update the code with the following:
import { Component, OnInit } from '@angular/core';
import { trigger,style,transition,animate,keyframes,query,stagger } from '@angular/animations';
import { InformationService } from '../information.service';
import { Router } from '@angular/router';
import { ActivatedRoute } from '@angular/router';

@Component({
  selector: 'app-schedules',
  templateUrl: './schedules.component.html',
  styleUrls: ['./schedules.component.scss'],
  animations: [

        trigger('schedules', [
          transition('* => *', [

            query(':enter', style({ opacity: 0 }), {optional: true}),

            query(':enter', stagger('250ms', [
              animate('.5s step-start', keyframes([
                style({opacity: 0, transform: 'translateY(-75%)', offset: 0}),
                style({opacity: .5, transform: 'translateY(35px)',  offset: 0.3}),
                style({opacity: 1, transform: 'translateY(0)',     offset: 1.0}),
              ]))]), {optional: true}),

            query(':leave', stagger('250ms', [
              animate('.5s step-end', keyframes([
                style({opacity: 1, transform: 'translateY(0)', offset: 0}),
                style({opacity: .5, transform: 'translateY(35px)',  offset: 0.3}),
                style({opacity: 0, transform: 'translateY(-75%)',     offset: 1.0}),
              ]))]), {optional: true})
          ])
        ])

      ]
})
export class SchedulesComponent implements OnInit {

  itemCount: number = 4;
  btnText: string = 'Add Schedule';
  scheduleText: string = 'A schedule';
  schedules = [];
  tasks: any
  memberId: number;

  constructor(private route: ActivatedRoute,private router: Router, private _information: InformationService) {
    this.route.params.subscribe(res => console.log(res.id));
  }

  ngOnInit() {
    this._information.schedule.subscribe(res => this.schedules = res);
    this.itemCount = this.schedules.length;
    this._information.changeSchedule(this.schedules);
    this._information.task.subscribe(res => this.tasks = res);
    this.route.params.subscribe(res => this.memberId = res.id);
  }

  addSchedule() {
    this.schedules.push(this.scheduleText);
    this.scheduleText = '';
    this.itemCount = this.schedules.length;
    this._information.changeSchedule(this.schedules);
  }

  removeSchedule(i) {
    this.schedules.splice(i, 1);
    this.scheduleText = '';
    this.itemCount = this.schedules.length;
    this._information.changeSchedule(this.schedules);
  }

  sendMeHome() {
    this.router.navigate(['']);
  }

}
schedules.component.ts also as logic similar to tasks.component.ts, but there is some extra code. It also has animations. For animations, I am adding some basic query for :enter, :leave and animations step-start and step-end. Compare the animations between Tasks and Schedules on the UI and you will see the difference when the list loads up on page load.Component Router Navigation
This is used to route the page based on a logic occurring in the component class. If you observe the code for /src/app/schedules/schedules.component.ts, this is done importing Router and then create an instance of Router through dependency injection in the constructor of the class and use it.
Here is the code used in: /src/app/schedules/schedules.component.ts
import { Router } from '@angular/router';

export class SchedulesComponent implements OnInit {\
constructor(private route: ActivatedRoute,private router: Router, private _information: InformationService) {
    this.route.params.subscribe(res => console.log(res.id));
  }

sendMeHome() {
    this.router.navigate(['']);
  }

}
sendMeHome will call the router path of our home page: TasksFinally open up /src/app/schedules/schedules.component.html and replace the code with the following:
<div class="container color-dark">
  <div class="col">
    <p>Add a Schedule</p>
  </div>
  <div class="col">
    <p>Your Schedules ({{ itemCount }})</p>
    </div>
</div>

<div class="container color-light" [@schedules]="schedules.length">
    <div class="col">
      <p class="sm">Add a new Schedule.</p>
        <form>
          <input type="text" class="txt" name="item" placeholder="Schedule.." [(ngModel)]="scheduleText">
          <input type="submit" class="btn" value="{{ btnText }}" (click)="addSchedule()">
        </form>
    </div>
    <div class="col">
      <p class="schedule-container" *ngFor="let schedule of schedules; let i = index" (click)="removeSchedule(i)">
        {{ schedule }}
      </p>
      </div>
  </div>

  <p>
    <strong>Member ID:</strong> {{ memberId }}
  </p>
  <div class="container color-dark">
  <p>Your Tasks</p>
  </div>
  <div class="container color-light">
    <div class="col">
      <p class="normal-container" *ngFor="let task of tasks;">
        {{ task }}
      </p>
      </div>
  </div>

  <p>
    <a href="" (click)="sendMeHome()"><strong>Back to Tasks and Reset</strong></a>.
  </p>
Now if you save the code and reload the HTML Schedules and go to the URL: http://localhost:4200/schedules/101, and hit CTRL-SHIFT-I to bring up the inspector and console log, you will see it shows a 101 which is the route parameter that we set. I am also displaying the same as Member ID on the Schedules page. Click on the link: Back to Tasks and Reset. and you will be taken to the Tasks page and all data is reset to the initial state. This shows the concept of: Component Router Navigation.One last thing to observe in /src/app/schedules/schedules.component.ts is that I am using the service that I created in Step 4 to subscribe to Tasks data in the Schedules Component and I am displaying the Tasks data on the Schedules page. The code is used in ngOnInit() as: this._information.task.subscribe(res => this.tasks = res);
Here is the corresponding block of code
ngOnInit() {
    this._information.schedule.subscribe(res => this.schedules = res);
    this.itemCount = this.schedules.length;
    this._information.changeSchedule(this.schedules);
    this._information.task.subscribe(res => this.tasks = res);
    this.route.params.subscribe(res => this.memberId = res.id);
  }
With all these changes done, the Schedules page on UI will look as below
Step 8: App Deployment
To build the app in the most optimized way, as for Production, use the command:
$ ng build --prodSince I have this project on GitHub, I will be deploying it to GitHub Pages. GitHub Pages allows to host projects on GitHub online as a website. Read more about GitHub Pages at: GitHub Pages Website.
Here are the steps to do this:
1. Install CLI tool globally using the command
$ npm i -g angular-cli-ghpages2. Then to push the Angular 5 project to a subfolder via Github pages, we need to rebuild it with the
--base-href flag. Here is the command that I have used as per my GitHub Account username and the Project Name that I have used in GitHub for this app
$ ng build --prod --base-href="https://ajtechdeveloper.github.io/Angular5/"3. Then use the GitHub Pages CLI to push the project to GitHub Pages
$ angular-cli-ghpagesIf everything is fine then you will get the message as below
  $ angular-cli-ghpages
  Successfully published!
This app can now be viewed online using the URL: https://ajtechdeveloper.github.io/Angular5/
Conclusion and GitHub link:
In this post I have shown how you can create an Angular 5 application from scratch. I have also given a comprehensive overview of the most important concepts and functionalities in Angular 5. This gives you a foundation on which you can experiment and build more complex functionalities in your own Angular 5 applications. The code used in this post is available on GitHub.
Learn the most popular and trending technologies like Machine Learning, Internet of Things (IoT), Akka HTTP, Play Framework, Dropwizard, Docker, Elastic Stack, Spring Boot and Flask in simple steps by reading my most popular blog posts at Software Developer Central.
If you like my post, please feel free to share it using the share button just below this paragraph or next to the heading of the post. You can also tweet with #SoftwareDeveloperCentral on Twitter. To get a notification on my latest posts or to keep the conversation going, you can follow me on Twitter. Please leave a note below if you have any questions or comments.


Comments
Post a Comment