Dropwizard MongoDB Tutorial
Dropwizard MongoDB Tutorial
Introduction
I was searching online for a Dropwizard MongoDB tutorial and all I could find were very old posts. Then I thought let me just look up for a Java MongoDB tutorial and even for this I could see very old posts dating back to 2011, 2012 and so on. The code used in these old posts cannot be used with the latest Mongo Java Driver. Hence I have come up with this post to give you a comprehensive overview of all the CRUD operations on MongoDB using the latest Mongo Java Driver.
Dropwizard is one of the most popular and most used frameworks for building microservices.
Dropwizard is one of the most popular and most used frameworks for building microservices.
I am assuming that you have a Basic Knowledge of Dropwizard and have a Basic Dropwizard Application running in your machine. If not, please check my blog on Basic Dropwizard Application by going to the link: Dropwizard Tutorial.
In this tutorial, we will be integrating a Dropwizard Application with MongoDB, which is a non-relational database, to perform CRUD operations. The same steps can be followed to connect to any other non-relational database.
Requirements to Run the Application:
Requirements to Run the Application:
- Java
- Maven
- MongoDB
- IDE of your choice
MongoDB should be setup and running in your machine. To setup, run and test if MongoDB is working fine, please refer to my post on: MongoDB Setup.
In my MongoDB, I have created a database named: softwaredevelopercentral and collection named: employees. Hence once I connect, here are a few useful queries that I use:
Once you have a Basic Dropwizard Application, here are the additional steps required to integrate it with MongoDB.
Here is the full pom.xml:
In my MongoDB, I have created a database named: softwaredevelopercentral and collection named: employees. Hence once I connect, here are a few useful queries that I use:
> show dbs
> use softwaredevelopercentral
> db.employees.find().pretty()
Once you have a Basic Dropwizard Application, here are the additional steps required to integrate it with MongoDB.
Step 1: Maven Dependencies to be added in pom.xml
Add mongo-java-driver and gson maven dependencies in the pom.xml. Here are dependencies: <dependency>
<groupId>org.mongodb</groupId>
<artifactId>mongo-java-driver</artifactId>
<version>3.5.0</version>
</dependency>
<dependency>
<groupId>com.google.code.gson</groupId>
<artifactId>gson</artifactId>
<version>2.8.1</version>
</dependency>
Here is the full pom.xml:
<?xml version="1.0" encoding="UTF-8"?>
<project xmlns="http://maven.apache.org/POM/4.0.0" xmlns:xsi="http://www.w3.org/2001/XMLSchema-instance" xsi:schemaLocation="http://maven.apache.org/POM/4.0.0 http://maven.apache.org/xsd/maven-4.0.0.xsd">
<modelVersion>4.0.0</modelVersion>
<groupId>com.aj.dropwizardmongodb</groupId>
<artifactId>DropwizardMongoDB</artifactId>
<version>1.0.0</version>
<properties>
<dropwizard.version>1.1.2</dropwizard.version>
<swagger.version>1.5.3-M1</swagger.version>
<jdk.version>1.8</jdk.version>
<packaging>jar</packaging>
</properties>
<dependencies>
<dependency>
<groupId>io.dropwizard</groupId>
<artifactId>dropwizard-core</artifactId>
<version>${dropwizard.version}</version>
</dependency>
<dependency>
<groupId>com.wordnik</groupId>
<artifactId>swagger-annotations</artifactId>
<version>${swagger.version}</version>
</dependency>
        <dependency>
            <groupId>org.mongodb</groupId>
            <artifactId>mongo-java-driver</artifactId>
            <version>3.5.0</version>
        </dependency>

        <dependency>
            <groupId>com.google.code.gson</groupId>
            <artifactId>gson</artifactId>
            <version>2.8.1</version>
        </dependency>
</dependencies>
<build>
<plugins>
<plugin>
<artifactId>maven-compiler-plugin</artifactId>
<version>3.0</version>
<configuration>
<source>1.8</source>
<target>1.8</target>
</configuration>
</plugin>
<plugin>
<groupId>org.apache.maven.plugins</groupId>
<artifactId>maven-jar-plugin</artifactId>
<version>2.4</version>
</plugin>
<plugin>
<groupId>org.apache.maven.plugins</groupId>
<artifactId>maven-shade-plugin</artifactId>
<version>2.3</version>
<configuration>
<createDependencyReducedPom>true</createDependencyReducedPom>
<filters>
<filter>
<artifact>*:*</artifact>
<excludes>
<exclude>META-INF/*.SF</exclude>
<exclude>META-INF/*.DSA</exclude>
<exclude>META-INF/*.RSA</exclude>
</excludes>
</filter>
</filters>
</configuration>
<executions>
<execution>
<phase>package</phase>
<goals>
<goal>shade</goal>
</goals>
<configuration>
<transformers>
<transformer implementation="org.apache.maven.plugins.shade.resource.ServicesResourceTransformer" />
<transformer implementation="org.apache.maven.plugins.shade.resource.ManifestResourceTransformer">
<mainClass>com.aj.dropwizardmongodb.DropwizardMongoDBApplication</mainClass>
</transformer>
</transformers>
</configuration>
</execution>
</executions>
</plugin>
</plugins>
</build>
</project>
Step 2: MongoDB Managed Object
Most services involve objects which need to be started and stopped: thread pools, database connections, etc. Dropwizard provides the Managed interface for this. You can either have the class in question implement the start() and stop() methods, or write a wrapper class which does so. Adding a Managed instance to your service’s Environment ties that object’s lifecycle to that of the service’s HTTP server. Before the server starts, the start() method is called. After the server has stopped (and after its graceful shutdown period) the stop() method is called. Hence we will configure MongoDB as a Managed object. Here is the code required to do that:
package com.aj.dropwizardmongodb;

import com.mongodb.Mongo;
import io.dropwizard.lifecycle.Managed;

public class MongoManaged implements Managed {

    private Mongo mongo;

    public MongoManaged(Mongo mongo) {
        this.mongo = mongo;
    }

    @Override
    public void start() throws Exception {
    }

    @Override
    public void stop() throws Exception {
        mongo.close();
    }

}
Step 3: MongoDB configuration in yml file and in the Configuration class
MongoDB configuration is added to the yml file. I have named my database as: softwaredevelopercentral and collection as: employees. Here is the database related configuration in the yml file:
mongoHost : localhost
mongoPort : 27017
mongoDB : softwaredevelopercentral
collectionName: employees
Here is the full yml file dropwizardmongodb.yml:
logging:
  level: INFO

  appenders:
    - type: console
      threshold: ALL
      timeZone: IST

server:
  type: simple
  applicationContextPath: /
  adminContextPath: /admin
  connector:
      port: 4000
      type: http

mongoHost : localhost
mongoPort : 27017
mongoDB : softwaredevelopercentral
collectionName: employees
Please Note: In the yml file above, I am setting the Application server port as 4000 and adminContextPath as: /adminStep 4: Create the Service Layer
We will create a service layer, that helps in all the interactions between the Resource and MongoDB.
In this class you can see how I am using operations on Mongo Collection like:
Here is the code for MongoService.java:
In this class you can see how I am using operations on Mongo Collection like:
- insertOne
- insertMany
- find
- updateOne
- deleteOne
Here is the code for MongoService.java:
package com.aj.dropwizardmongodb.service;

import com.aj.dropwizardmongodb.domain.Employee;
import com.mongodb.client.FindIterable;
import com.mongodb.client.MongoCollection;
import org.bson.Document;

import java.util.ArrayList;
import java.util.List;

import static com.mongodb.client.model.Filters.*;

public class MongoService {

    public void insertOne(MongoCollection<Document> collection, Document document) {
        collection.insertOne(document);
    }

    public void insertMany(MongoCollection<Document> collection, List<Document> documents) {
        collection.insertMany(documents);
    }

    public List<Document> find(MongoCollection<Document> collection) {
        return collection.find().into(new ArrayList<>());
    }

    public List<Document> findByKey(MongoCollection<Document> collection, String key, String value) {
        return collection.find(eq(key, value)).into(new ArrayList<>());
    }

    public List<Document> findByCriteria(MongoCollection<Document> collection, String key, int lessThanValue, int greaterThanValue, int sortOrder) {
        List<Document> documents = new ArrayList<>();
        FindIterable iterable = collection.find(and(lt(key, lessThanValue),
                gt(key, greaterThanValue))).sort(new Document(key, sortOrder));
        iterable.into(documents);
        return documents;
    }

    public void updateOneEmployee(MongoCollection<Document> collection, String key1, String key2, String key3, Employee employee) {
        collection.updateOne(new Document(key1, employee.getName()),
                new Document("$set", new Document(key2, employee.getDepartment()).append(key3, employee.getSalary())));
    }

    public void deleteOne(MongoCollection<Document> collection, String key, String value) {
        collection.deleteOne(eq(key, value));
    }
}
Step 5: Create Resource Class with RESTful APIs for CRUD operations on the Database
The EmployeeResource class has the following APIs:
- GET API to get all employees
- GET API to get an employee by NAME
- GET API to get all employees with salary greater than 1000 and less than 25000 sorted in ascending order
- POST API to create an employee
- POST API to create many employees
- PUT API to update an employee by NAME
- DELETE API to delete an employee by NAME
Here is the code for EmployeeResource.java:
package com.aj.dropwizardmongodb.resource;

import com.aj.dropwizardmongodb.domain.Employee;
import com.aj.dropwizardmongodb.service.MongoService;
import com.codahale.metrics.annotation.Timed;
import com.google.gson.Gson;
import com.mongodb.BasicDBObject;
import com.mongodb.client.MongoCollection;
import com.wordnik.swagger.annotations.Api;
import org.bson.Document;

import javax.validation.Valid;
import javax.validation.constraints.NotNull;
import javax.ws.rs.*;
import javax.ws.rs.core.MediaType;
import javax.ws.rs.core.Response;
import java.util.ArrayList;
import java.util.HashMap;
import java.util.List;
import java.util.Map;

@Path("/employee")
@Produces(MediaType.APPLICATION_JSON)
@Api(value = "employee", description = "Employee Resource for performing CRUD operations on employees Collection")
public class EmployeeResource {

    private MongoCollection<Document> collection;
    private final MongoService mongoService;

    public EmployeeResource(MongoCollection<Document> collection, MongoService mongoService) {
        this.collection = collection;
        this.mongoService = mongoService;
    }

    @POST
    @Timed
    @Produces(MediaType.APPLICATION_JSON)
    @Consumes(MediaType.APPLICATION_JSON)
    public Response createEmployee(@NotNull @Valid final Employee employee) {
        Gson gson = new Gson();
        String json = gson.toJson(employee);
        mongoService.insertOne(collection, new Document(BasicDBObject.parse(json)));
        Map<String, String> response = new HashMap<>();
        response.put("message", "Employee created successfully");
        return Response.ok(response).build();
    }

    @POST
    @Timed
    @Path("/createEmployees")
    @Produces(MediaType.APPLICATION_JSON)
    @Consumes(MediaType.APPLICATION_JSON)
    public Response createEmployees(@NotNull final List<Employee> employees) {
        List<Document> employeeDocuments = new ArrayList<>();
        Gson gson = new Gson();
        String json;
        for (Employee employee : employees) {
            json = gson.toJson(employee);
            employeeDocuments.add(new Document(BasicDBObject.parse(json)));
        }
        mongoService.insertMany(collection, employeeDocuments);
        Map<String, String> response = new HashMap<>();
        response.put("message", "Employees created successfully");
        return Response.ok(response).build();
    }

    @GET
    @Timed
    public Response getEmployees() {
        List<Document> documents = mongoService.find(collection);
        return Response.ok(documents).build();
    }

    @GET
    @Timed
    @Path("{name}")
    public Response getEmployee(@PathParam("name") final String name) {
        List<Document> documents = mongoService.findByKey(collection, "name", name);
        return Response.ok(documents).build();
    }

    @GET
    @Timed
    @Path("/salary/sort")
    public Response getEmployee() {
        List<Document> documents = mongoService.findByCriteria(collection, "salary",
                25000, 1000, 1);
        return Response.ok(documents).build();
    }

    @PUT
    @Timed
    public Response editEmployee(@NotNull @Valid final Employee employee) {
        mongoService.updateOneEmployee(collection, "name", "department", "salary", employee);
        Map<String, String> response = new HashMap<>();
        response.put("message", "Employee with Name: " + employee.getName() + " updated successfully");
        return Response.ok(response).build();
    }

    @DELETE
    @Timed
    @Path("{name}")
    public Response deleteEmployee(@PathParam("name") final String name) {
        mongoService.deleteOne(collection, "name", name);
        Map<String, String> response = new HashMap<>();
        response.put("message", "Employee with Name: " + name + " deleted successfully");
        return Response.ok(response).build();
    }
}
Step 6: Create Health Check Class
In the health check class, I have written code to list all the databases in MongoDB. From the result we can know if the database is up and running. Thus we will be able to do the health check for our application. Here is the code for DropwizardMongoDBHealthCheckResource.java:
package com.aj.dropwizardmongodb.resource;

import com.codahale.metrics.health.HealthCheck;
import com.mongodb.MongoClient;
import com.mongodb.client.MongoCursor;
import org.slf4j.Logger;
import org.slf4j.LoggerFactory;

import java.util.ArrayList;
import java.util.List;

public class DropwizardMongoDBHealthCheckResource extends HealthCheck {

    private static final Logger logger = LoggerFactory.getLogger(DropwizardMongoDBHealthCheckResource.class);

    private MongoClient mongoClient;

    public DropwizardMongoDBHealthCheckResource(MongoClient mongoClient) {
        this.mongoClient = mongoClient;
    }

    @Override
    protected Result check() throws Exception {
        List<String> dbs = new ArrayList<>();
        MongoCursor<String> dbsCursor = mongoClient.listDatabaseNames().iterator();
        while (dbsCursor.hasNext()) {
            dbs.add(dbsCursor.next());
        }
        if (dbs.size() > 0) {
            return Result.healthy("Database names in MongogDB are: " + dbs);
        }
        return Result.unhealthy("DropwizardMongoDB Service is down");
    }
}
Step 7: Create the Application Class
Everything comes together in the application class. We register the resources, health check and MongoDB Managed Object in the application class. Here is the code for DropwizardMongoDBApplication.java:
package com.aj.dropwizardmongodb;

import com.aj.dropwizardmongodb.resource.DropwizardMongoDBHealthCheckResource;
import com.aj.dropwizardmongodb.resource.EmployeeResource;
import com.aj.dropwizardmongodb.resource.PingResource;
import com.aj.dropwizardmongodb.service.MongoService;
import com.mongodb.MongoClient;
import com.mongodb.client.MongoCollection;
import com.mongodb.client.MongoDatabase;
import io.dropwizard.Application;
import io.dropwizard.setup.Bootstrap;
import io.dropwizard.setup.Environment;
import org.bson.Document;
import org.slf4j.Logger;
import org.slf4j.LoggerFactory;


public class DropwizardMongoDBApplication extends Application<DropwizardMongoDBConfiguration> {

    private static final Logger logger = LoggerFactory.getLogger(DropwizardMongoDBApplication.class);

    public static void main(String[] args) throws Exception {
        new DropwizardMongoDBApplication().run("server", args[0]);
    }

    @Override
    public void initialize(Bootstrap<DropwizardMongoDBConfiguration> b) {
    }

    @Override
    public void run(DropwizardMongoDBConfiguration config, Environment env)
            throws Exception {
        MongoClient mongoClient = new MongoClient(config.getMongoHost(), config.getMongoPort());
        MongoManaged mongoManaged = new MongoManaged(mongoClient);
        env.lifecycle().manage(mongoManaged);
        MongoDatabase db = mongoClient.getDatabase(config.getMongoDB());
        MongoCollection<Document> collection = db.getCollection(config.getCollectionName());
        logger.info("Registering RESTful API resources");
        env.jersey().register(new PingResource());
        env.jersey().register(new EmployeeResource(collection, new MongoService()));
        env.healthChecks().register("DropwizardMongoDBHealthCheck",
                new DropwizardMongoDBHealthCheckResource(mongoClient));
    }
}
Project Setup:
For Java Setup, please refer to: Java Setup
For Maven Setup, please refer to: Maven Setup
For Git and Project Setup, please refer to: Git and Project Setup
For Maven Setup, please refer to: Maven Setup
For Git and Project Setup, please refer to: Git and Project Setup
Run Application:
1. Start MongoDB by going to the bin directory on the MongoDB folder in command prompt and executing the command given below.D:\Programs\MongoDB\Server\3.4\bin>mongod.exe --dbpath D:\Programs\MongoDB\Server\3.4\data
You can see the start-up logs being printed.
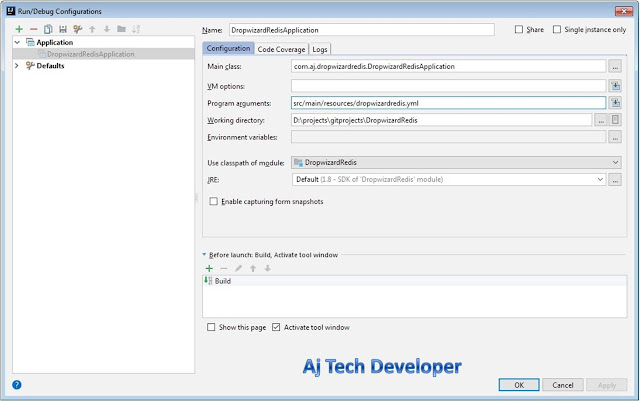
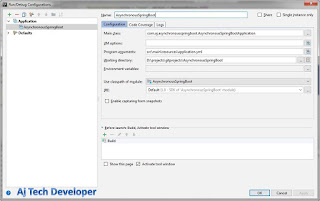
2. To run application in your IDE use:
Program arguments: src/main/resources/dropwizardmongodb.yml

3. To run JAR from command prompt:
Build jar by using command:
mvn clean installRun JAR by using command in Project folder location:
java -jar target\DropwizardMongoDB-1.0.0.jar src/main/resources/dropwizardmongodb.yml
API calls and results:
1. POST API to create an employee
JSON Request Body: {
"name": "Daniel",
"department": "Accounts",
"salary": 8000
}
2. POST API to create many employees
http://localhost:4000/employee/createEmployees
JSON Request Body:
  [
   {
    "name": "Jim",
    "department": "HR",
    "salary": 10000
   },
   {
    "name": "Jane",
    "department": "Technology",
    "salary": 15000
   }
  ]
3. GET API to get all employees:
4. GET API to get employee by NAME
5. GET API to find all employees by a query criteria: Here I am using the query criteria: SALARY greater than 1000 and less than 25000 sorted in ascending order.
http://localhost:4000/employee/salary/sort
    {
     "name": "Jane",
     "department": "Technology",
     "salary": 18000
    }
7. DELETE API to delete an employee by NAME
http://localhost:4000/employee/Jim
Other than these APIs, this application has the following APIs:
2. GET API to Ping and test if the application is up and running:
3. POST API to Ping and test if the application is up and running:
JSON Request Body:
    {
     "input": "ping"
    }
4. GET Admin API to see application metrics: Dropwizard provides this Admin API. As I have set adminContextPath as: /admin in dropwizardmongodb.yml the link I need to use in any browser is: http://localhost:4000/admin/
You can click on individual links on this page to see different application metrics.

You can click on individual links on this page to see different application metrics.

Conclusion and GitHub link:
In this post I have shown you how you can integrate your existing Dropwizard Application with MongoDB and perform CRUD operations using RESTful APIs. The code used in this post is available on GitHub.
Dropwizard and Spring Boot are the most popular and most used frameworks for building microservices. Just like Dropwizard, Spring Boot also can be integrated with MongoDB in a few simple steps. To see how it is done, please check my post on Spring Boot MongoDB integration by going to the link: Spring Boot MongoDB Tutorial.
Learn the most popular and trending technologies like Machine Learning, Angular 5, Internet of Things (IoT), Akka HTTP, Play Framework, Dropwizard, Docker, Elastic Stack, Netflix Eureka, Netflix Zuul, Spring Cloud, Spring Boot, Flask and RESTful Web Service integration with MongoDB, Kafka, Redis, Aerospike, MySQL DB in simple steps by reading my most popular blog posts at Software Developer Central.
If you like my post, please feel free to share it using the share button just below this paragraph or next to the heading of the post. You can also tweet with #SoftwareDeveloperCentral on Twitter. To get a notification on my latest posts or to keep the conversation going, you can follow me on Twitter. Please leave a note below if you have any questions or comments.

Very good. It helped me to implement MongoDB in my microservice. However, what happen if you have more than one Collection to connect to?
ReplyDeleteHi @klk, Thanks for your comment.
DeleteFor more than one collection also you can follow the same approach mentioned in this post. Here are the steps for simplicity:
1. Add a new entry in the dropwizardmongodb.yml file and mention your new collection name just like employees like for example: collection1: designations
2. Create a getter and setter in the DropwizardMongoDBConfiguration.java file for the new entry in the yml file like for example getCollection1 and setCollection1
3. In DropwizardMongoDBApplication.java file, initialize the new collection just like the first one, but with the new getter defined in step 2 as below:
MongoCollection collection1 = db.getCollection(config.getCollection1());
4. Create a new resource for example DesignationResource.java for all operations on this collection.
5. Register it in DropwizardMongoDBApplication.java with the new collection as below:
env.jersey().register(new DesignationResource(collection1, new MongoService()));