Dropwizard MySQL Integration Tutorial
Dropwizard MySQL Integration Tutorial
Introduction
Dropwizard is one of the most popular and most used frameworks for building microservices.
I am assuming that you have a Basic Knowledge of Dropwizard and have a Basic Dropwizard Application running in your machine. If not, please check my blog on Basic Dropwizard Application by going to the link: Dropwizard Tutorial.
In this tutorial, we will be integrating a Dropwizard Application with MySQL Database, which is a relational database, to perform CRUD operations. The same steps can be followed to connect to any other relational database.
Requirements to Run the Application:
Requirements to Run the Application:
- Java
- Maven
- MySQL Database
- IDE of your choice
MySQL Database should be setup and running in your machine. To setup, run and test if the MySQL Database is working fine, please refer to my post on: MySQL Database Setup.
In this post, I am using a simple Employee Table to perform CRUD operations. Here is the script to create this table in the MySQL Database:
CREATE TABLE EMPLOYEE (
ID INT NOT NULL AUTO_INCREMENT PRIMARY KEY,
NAME VARCHAR(50),
DEPARTMENT VARCHAR(50),
SALARY INT(20)
);
Once you have a Basic Dropwizard Application, here are the additional steps required to integrate it with MySQL Database.
Step 1: Dropwizard JDBI and Java MySQL Connector Maven Dependencies to be added in pom.xml
Add dropwizard-jdbi and mysql-connector-java maven dependencies in the pom.xml. Here are dependencies and related properties
<properties>
    <dropwizard.version>1.1.2</dropwizard.version>
</properties>
        <dependency>
            <groupId>io.dropwizard</groupId>
            <artifactId>dropwizard-jdbi</artifactId>
            <version>${dropwizard.version}</version>
        </dependency>

        <dependency>
            <groupId>mysql</groupId>
            <artifactId>mysql-connector-java</artifactId>
            <version>6.0.6</version>
        </dependency>
Here is the full pom.xml:
<?xml version="1.0" encoding="UTF-8"?>
<project xmlns="http://maven.apache.org/POM/4.0.0" xmlns:xsi="http://www.w3.org/2001/XMLSchema-instance" xsi:schemaLocation="http://maven.apache.org/POM/4.0.0 http://maven.apache.org/xsd/maven-4.0.0.xsd">
 <modelVersion>4.0.0</modelVersion>
 <groupId>com.aj.dropwizardmysql</groupId>
 <artifactId>DropwizardMySQL</artifactId>
 <version>1.0.0</version>


 <properties>
  <dropwizard.version>1.1.2</dropwizard.version>
        <swagger.version>1.5.3-M1</swagger.version>
        <jdk.version>1.8</jdk.version>
  <packaging>jar</packaging>
 </properties>

 <dependencies>

  <dependency>
            <groupId>io.dropwizard</groupId>
            <artifactId>dropwizard-core</artifactId>
            <version>${dropwizard.version}</version>
        </dependency>

        <dependency>
            <groupId>io.dropwizard</groupId>
            <artifactId>dropwizard-jdbi</artifactId>
            <version>${dropwizard.version}</version>
        </dependency>

        <dependency>
            <groupId>mysql</groupId>
            <artifactId>mysql-connector-java</artifactId>
            <version>6.0.6</version>
        </dependency>

        <dependency>
            <groupId>com.wordnik</groupId>
            <artifactId>swagger-annotations</artifactId>
            <version>${swagger.version}</version>
        </dependency>

 </dependencies>

 <build>
  <plugins>
   <plugin>
    <artifactId>maven-compiler-plugin</artifactId>
    <version>3.0</version>
    <configuration>
     <source>1.8</source>
     <target>1.8</target>
    </configuration>
   </plugin>
   <plugin>
    <groupId>org.apache.maven.plugins</groupId>
    <artifactId>maven-jar-plugin</artifactId>
    <version>2.4</version>
   </plugin>
   <plugin>
    <groupId>org.apache.maven.plugins</groupId>
    <artifactId>maven-shade-plugin</artifactId>
    <version>2.3</version>
    <configuration>
     <createDependencyReducedPom>true</createDependencyReducedPom>
     <filters>
      <filter>
       <artifact>*:*</artifact>
       <excludes>
        <exclude>META-INF/*.SF</exclude>
        <exclude>META-INF/*.DSA</exclude>
        <exclude>META-INF/*.RSA</exclude>
       </excludes>
      </filter>
     </filters>
    </configuration>
    <executions>
     <execution>
      <phase>package</phase>
      <goals>
       <goal>shade</goal>
      </goals>
      <configuration>
       <transformers>
        <transformer implementation="org.apache.maven.plugins.shade.resource.ServicesResourceTransformer" />
        <transformer implementation="org.apache.maven.plugins.shade.resource.ManifestResourceTransformer">
         <mainClass>com.aj.dropwizardmysql.DropwizardMySQLApplication</mainClass>
        </transformer>
       </transformers>
      </configuration>
     </execution>
    </executions>
   </plugin>
  </plugins>
 </build>
</project>
Step 2: Setup Database configuration in yml file and DataSourceFactory in Configuration class
Database configuration is added to yml file. I have named my database as: softwaredevelopercentral. Here is the database related configuration in the yml file:
database:
  driverClass: com.mysql.cj.jdbc.Driver
  url: jdbc:mysql://localhost:3306/softwaredevelopercentral?autoReconnect=true&useSSL=false
  user: root
  password:
  maxWaitForConnection: 1s
  validationQuery: "SELECT 1"
  validationQueryTimeout: 3s
  minSize: 8
  maxSize: 32
  checkConnectionWhileIdle: false
  evictionInterval: 10s
  minIdleTime: 1 minute
  checkConnectionOnBorrow: true
Here is the full yml file dropwizardmysql.yml:
logging:
  level: INFO

  appenders:
    - type: console
      threshold: ALL
      timeZone: IST

server:
  type: simple
  applicationContextPath: /
  adminContextPath: /admin
  connector:
      port: 4000
      type: http

database:
  driverClass: com.mysql.cj.jdbc.Driver
  url: jdbc:mysql://localhost:3306/softwaredevelopercentral?autoReconnect=true&useSSL=false
  user: root
  password:
  maxWaitForConnection: 1s
  validationQuery: "SELECT 1"
  validationQueryTimeout: 3s
  minSize: 8
  maxSize: 32
  checkConnectionWhileIdle: false
  evictionInterval: 10s
  minIdleTime: 1 minute
  checkConnectionOnBorrow: true
Please Note: In the yml file above, I am setting the Application server port as 4000 and adminContextPath as: /admin
Step 3: Create Resource Class with RESTful APIs for CRUD operations on the Database
The EmployeeResource class has the following APIs:
- GET API to get all employees
- GET API to get employee by ID
- POST API to create an employee
- DELETE API to delete an employee by ID
- PUT API to update an employee by ID
Here is the code for EmployeeResource.java:
package com.aj.dropwizardmysql.resource;

import com.aj.dropwizardmysql.domain.Employee;
import com.aj.dropwizardmysql.service.EmployeeService;
import com.codahale.metrics.annotation.Timed;
import com.wordnik.swagger.annotations.Api;

import javax.validation.Valid;
import javax.validation.constraints.NotNull;
import javax.ws.rs.*;
import javax.ws.rs.core.MediaType;
import javax.ws.rs.core.Response;
import java.util.HashMap;
import java.util.Map;

@Path("/employee")
@Produces(MediaType.APPLICATION_JSON)
@Api(value = "employee", description = "Employee Resource for performing CRUD operations on Employee Table")
public class EmployeeResource {

    private final EmployeeService employeeService;

    public EmployeeResource(EmployeeService employeeService) {
        this.employeeService = employeeService;
    }

    @GET
    @Timed
    public Response getEmployees() {
        return Response.ok(employeeService.getEmployees()).build();
    }

    @GET
    @Timed
    @Path("{id}")
    public Response getEmployee(@PathParam("id") final int id) {
        return Response.ok(employeeService.getEmployee(id)).build();
    }

    @POST
    @Timed
    public Response createEmployee(@NotNull @Valid final Employee employee) {
        Employee employeeCreate = new Employee(employee.getName(),employee.getDepartment(),employee.getSalary());
        return Response.ok(employeeService.createEmployee(employeeCreate)).build();
    }

    @PUT
    @Timed
    @Path("{id}")
    public Response editEmployee(@NotNull @Valid final Employee employee,
                                 @PathParam("id") final int id) {
        employee.setId(id);
        return Response.ok(employeeService.editEmployee(employee)).build();
    }

    @DELETE
    @Timed
    @Path("{id}")
    public Response deleteEmployee(@PathParam("id") final int id) {
        Map<String, String> response = new HashMap<>();
        response.put("status", employeeService.deleteEmployee(id));
        return Response.ok(response).build();
    }
}
Step 4: Create the Service Layer
We will create a service layer, that acts as a mediator between the Resource and DAO layers. Here is the code for EmployeeService.java:
package com.aj.dropwizardmysql.service;

import com.aj.dropwizardmysql.dao.EmployeeDao;
import com.aj.dropwizardmysql.domain.Employee;
import org.skife.jdbi.v2.exceptions.UnableToExecuteStatementException;
import org.skife.jdbi.v2.exceptions.UnableToObtainConnectionException;
import org.skife.jdbi.v2.sqlobject.CreateSqlObject;
import org.slf4j.Logger;
import org.slf4j.LoggerFactory;

import javax.ws.rs.WebApplicationException;
import javax.ws.rs.core.Response.Status;

import java.util.List;
import java.util.Objects;

public abstract class EmployeeService {

    private static final Logger logger = LoggerFactory.getLogger(EmployeeService.class);

    private static final String DATABASE_ACCESS_ERROR =
            "Could not reach the MySQL database. The database may be down or there may be network connectivity issues. Details: ";
    private static final String DATABASE_CONNECTION_ERROR =
            "Could not create a connection to the MySQL database. The database configurations are likely incorrect. Details: ";
    private static final String UNEXPECTED_DATABASE_ERROR =
            "Unexpected error occurred while attempting to reach the database. Details: ";
    private static final String SUCCESS = "Success";
    private static final String UNEXPECTED_DELETE_ERROR = "An unexpected error occurred while deleting employee.";
    private static final String EMPLOYEE_NOT_FOUND = "Employee id %s not found.";

    @CreateSqlObject
    abstract EmployeeDao employeeDao();

    public List<Employee> getEmployees() {
        return employeeDao().getEmployees();
    }

    public Employee getEmployee(int id) {
        Employee employee = employeeDao().getEmployee(id);
        if (Objects.isNull(employee)) {
            throw new WebApplicationException(String.format(EMPLOYEE_NOT_FOUND, id), Status.NOT_FOUND);
        }
        return employee;
    }

    public Employee createEmployee(Employee employee) {
        employeeDao().createEmployee(employee);
        return employeeDao().getEmployee(employeeDao().lastInsertId());
    }

    public Employee editEmployee(Employee employee) {
        if (Objects.isNull(employeeDao().getEmployee(employee.getId()))) {
            throw new WebApplicationException(String.format(EMPLOYEE_NOT_FOUND, employee.getId()),
                    Status.NOT_FOUND);
        }
        employeeDao().editEmployee(employee);
        return employeeDao().getEmployee(employee.getId());
    }

    public String deleteEmployee(final int id) {
        int result = employeeDao().deleteEmployee(id);
        logger.info("Result in EmployeeService.deleteEmployee is: {}", result );
        switch (result) {
            case 1:
                return SUCCESS;
            case 0:
                throw new WebApplicationException(String.format(EMPLOYEE_NOT_FOUND, id), Status.NOT_FOUND);
            default:
                throw new WebApplicationException(UNEXPECTED_DELETE_ERROR, Status.INTERNAL_SERVER_ERROR);
        }
    }

    public String performHealthCheck() {
        try {
            employeeDao().getEmployees();
        } catch (UnableToObtainConnectionException ex) {
            return checkUnableToObtainConnectionException(ex);
        } catch (UnableToExecuteStatementException ex) {
            return checkUnableToExecuteStatementException(ex);
        } catch (Exception ex) {
            return UNEXPECTED_DATABASE_ERROR + ex.getCause().getLocalizedMessage();
        }
        return null;
    }

    private String checkUnableToObtainConnectionException(UnableToObtainConnectionException ex) {
        if (ex.getCause() instanceof java.sql.SQLNonTransientConnectionException) {
            return DATABASE_ACCESS_ERROR + ex.getCause().getLocalizedMessage();
        } else if (ex.getCause() instanceof java.sql.SQLException) {
            return DATABASE_CONNECTION_ERROR + ex.getCause().getLocalizedMessage();
        } else {
            return UNEXPECTED_DATABASE_ERROR + ex.getCause().getLocalizedMessage();
        }
    }

    private String checkUnableToExecuteStatementException(UnableToExecuteStatementException ex) {
        if (ex.getCause() instanceof java.sql.SQLSyntaxErrorException) {
            return DATABASE_CONNECTION_ERROR + ex.getCause().getLocalizedMessage();
        } else {
            return UNEXPECTED_DATABASE_ERROR + ex.getCause().getLocalizedMessage();
        }
    }
}
Step 5: Create DAO Layer and use JDBI and Mapper Class
Here is a simple POJO to represent the Employee Table in the database:package com.aj.dropwizardmysql.domain;
import com.fasterxml.jackson.annotation.JsonProperty;
public class Employee {
@JsonProperty
private Integer id;
@JsonProperty
private String name;
@JsonProperty
private String department;
@JsonProperty
private Integer salary;
public Employee() {
super();
}
public Employee(String name, String department, Integer salary) {
super();
this.name = name;
this.department = department;
this.salary = salary;
}
public Integer getId() {
return id;
}
public void setId(Integer id) {
this.id = id;
}
public String getName() {
return name;
}
public void setName(String name) {
this.name = name;
}
public String getDepartment() {
return department;
}
public void setDepartment(String department) {
this.department = department;
}
public Integer getSalary() {
return salary;
}
public void setSalary(Integer salary) {
this.salary = salary;
}
@Override
public String toString() {
return "Employee{" +
"id=" + id +
", name='" + name + '\'' +
", department='" + department + '\'' +
", salary=" + salary +
'}';
}
}
The SQL result sets have to be mapped to the model class. We do this by using a Mapper class. Here is the code:
package com.aj.dropwizardmysql.mapper;

import java.sql.ResultSet;
import java.sql.SQLException;

import org.skife.jdbi.v2.StatementContext;
import org.skife.jdbi.v2.tweak.ResultSetMapper;
import com.aj.dropwizardmysql.domain.Employee;


public class EmployeeMapper implements ResultSetMapper<Employee> {
    private static final String ID = "id";
    private static final String NAME = "name";
    private static final String DEPARTMENT = "department";
    private static final String SALARY = "salary";

    public Employee map(int i, ResultSet resultSet, StatementContext statementContext)
            throws SQLException {
        Employee employee = new Employee(resultSet.getString(NAME), resultSet.getString(DEPARTMENT),resultSet.getInt(SALARY));
        employee.setId(resultSet.getInt(ID));
        return employee;
    }
}
We have to register the mapper in the DAO interface. Using JDBI we can write simple queries using annotations such as @SqlQuery for reading and @SqlUpdate for writing data. You can see how it is being used in the DAO interface. Here is the DAO interface:
package com.aj.dropwizardmysql.dao;

import com.aj.dropwizardmysql.domain.Employee;
import com.aj.dropwizardmysql.mapper.EmployeeMapper;
import org.skife.jdbi.v2.sqlobject.Bind;
import org.skife.jdbi.v2.sqlobject.BindBean;
import org.skife.jdbi.v2.sqlobject.SqlQuery;
import org.skife.jdbi.v2.sqlobject.SqlUpdate;
import org.skife.jdbi.v2.sqlobject.customizers.RegisterMapper;

import java.util.List;

@RegisterMapper(EmployeeMapper.class)
public interface EmployeeDao {

    @SqlQuery("select * from employee;")
    public List<Employee> getEmployees();

    @SqlQuery("select * from employee where id = :id")
    public Employee getEmployee(@Bind("id") final int id);

    @SqlUpdate("insert into employee(name, department, salary) values(:name, :department, :salary)")
    void createEmployee(@BindBean final Employee employee);

    @SqlUpdate("update employee set name = coalesce(:name, name), " +
            " department = coalesce(:department, department), salary = coalesce(:salary, salary)" +
            " where id = :id")
    void editEmployee(@BindBean final Employee employee);

    @SqlUpdate("delete from employee where id = :id")
    int deleteEmployee(@Bind("id") final int id);

    @SqlQuery("select last_insert_id();")
    public int lastInsertId();
}
Step 6: Create Health Check class
In the health check class, I have written code to query the database. From the result we can know if the database is up and running. Thus we will be able to do the health check for our application. Here is the code:
package com.aj.dropwizardmysql.resource;

import com.aj.dropwizardmysql.service.EmployeeService;
import com.codahale.metrics.health.HealthCheck;

public class DropwizardMySQLHealthCheckResource extends HealthCheck {

    private static final String HEALTHY_MESSAGE = "The Dropwizard blog Service is healthy for read and write";
    private static final String UNHEALTHY_MESSAGE = "The Dropwizard blog Service is not healthy. ";

    private final EmployeeService employeeService;

    public DropwizardMySQLHealthCheckResource(EmployeeService employeeService) {
        this.employeeService = employeeService;
    }

    @Override
    public Result check() throws Exception {
        String mySqlHealthStatus = employeeService.performHealthCheck();

        if (mySqlHealthStatus == null) {
            return Result.healthy(HEALTHY_MESSAGE);
        } else {
            return Result.unhealthy(UNHEALTHY_MESSAGE , mySqlHealthStatus);
        }
    }
}
Step 7: Create the Application class to register resources and health check and setup DataSource
Everything comes together in the application class. We register the resources, health check and setup the DataSource in the application class. Here is the code:
package com.aj.dropwizardmysql;

import com.aj.dropwizardmysql.resource.DropwizardMySQLHealthCheckResource;
import com.aj.dropwizardmysql.resource.EmployeeResource;
import com.aj.dropwizardmysql.resource.PingResource;
import com.aj.dropwizardmysql.service.EmployeeService;
import io.dropwizard.Application;
import io.dropwizard.setup.Bootstrap;
import io.dropwizard.setup.Environment;
import org.slf4j.Logger;
import org.slf4j.LoggerFactory;
import javax.sql.DataSource;
import org.skife.jdbi.v2.DBI;


public class DropwizardMySQLApplication extends Application<DropwizardMySQLConfiguration> {

    private static final Logger logger = LoggerFactory.getLogger(DropwizardMySQLApplication.class);
 private static final String SQL = "sql";
 private static final String DROPWIZARD_MYSQL_SERVICE = "Dropwizard MySQL Service";

 public static void main(String[] args) throws Exception {
  new DropwizardMySQLApplication().run("server", args[0]);
 }

    @Override
    public void initialize(Bootstrap<DropwizardMySQLConfiguration> b) {
    }

 @Override
 public void run(DropwizardMySQLConfiguration config, Environment env)
   throws Exception {
        // Datasource configuration
        final DataSource dataSource =
                config.getDataSourceFactory().build(env.metrics(), SQL);
        DBI dbi = new DBI(dataSource);

        // Register Health Check
        DropwizardMySQLHealthCheckResource healthCheck =
                new DropwizardMySQLHealthCheckResource(dbi.onDemand(EmployeeService.class));
        env.healthChecks().register(DROPWIZARD_MYSQL_SERVICE, healthCheck);
     logger.info("Registering RESTful API resources");
  env.jersey().register(new PingResource());
        env.jersey().register(new EmployeeResource(dbi.onDemand(EmployeeService.class)));
 }
}
Project Setup:
For Java Setup, please refer to: Java Setup
For Maven Setup, please refer to: Maven Setup
For Git and Project Setup, please refer to: Git and Project Setup
For Maven Setup, please refer to: Maven Setup
For Git and Project Setup, please refer to: Git and Project Setup
Run Application:
1. Start the MySQL Database by going to the bin directory on the MySQL folder in command prompt and executing the command given below.For me it is: D:\Programs\mysql-5.7.19-winx64\bin and the command is:
mysqld --console
You can see the start-up logs being printed.
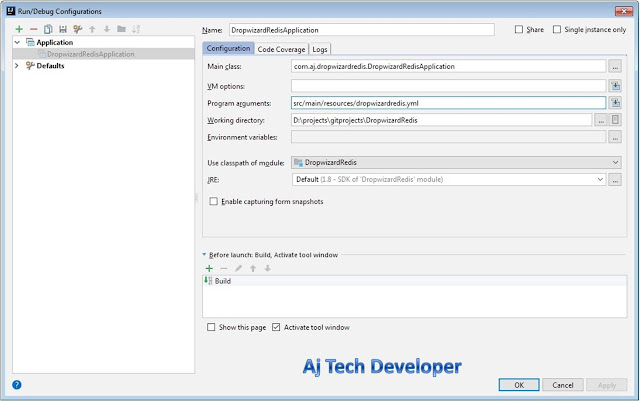
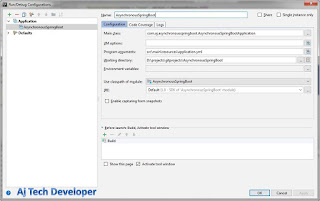
2. To run application in your IDE use:
Program arguments: src/main/resources/dropwizardmysql.yml

3. To run JAR from command prompt:
Build jar by using command:
mvn clean installRun JAR by using command in Project folder location:
java -jar target\DropwizardMySQL-1.0.0.jar src/main/resources/dropwizardmysql.yml
API calls and results:
1. GET API to get all employees:
2. GET API to get employee by ID
3. POST API to create an employee
  {
   "name": "Jim",
   "department": "Accounts",
   "salary": 10000
  }
JSON Request Body:
    {
     "name": "Jim",
     "department": "Accounts",
     "salary": 12000
    }
Other than these APIs, this application has the following APIs:
2. GET API to Ping and test if the application is up and running:
3. POST API to Ping and test if the application is up and running:
JSON Request Body:
    {
     "input": "ping"
    }
Conclusion and GitHub link:
In this post I have shown you how you can integrate your existing Dropwizard Application with MySQL Database and perform CRUD operations using RESTful APIs. The code used in this post is available on GitHub.
Dropwizard and Spring Boot are the most popular and most used frameworks for building microservices. Just like Dropwizard, Spring Boot also can be integrated with MySQL DB in a few simple steps. To see how it is done, please check my post on Spring Boot MySQL integration by going to the link: Spring Boot MySQL Integration Tutorial.
Learn the most popular and trending technologies like Blockchain, Cryptocurrency, Machine Learning, Chatbots, Internet of Things (IoT), Big Data Processing, Elastic Stack, React, Progressive Web Application (PWA), Angular 5, GraphQL, Akka HTTP, Play Framework, Dropwizard, Docker, Netflix Eureka, Netflix Zuul, Spring Cloud, Spring Boot, Flask and RESTful Web Service integration with MongoDB, Kafka, Redis, Aerospike, MySQL DB in simple steps by reading my most popular blog posts at Software Developer Central.
If you like my post, please feel free to share it using the share button just below this paragraph or next to the heading of the post. You can also tweet with #SoftwareDeveloperCentral on Twitter. To get a notification on my latest posts or to keep the conversation going, you can follow me on Twitter or Instagram. Please leave a note below if you have any questions or comments.

Hi, I ran your code on IntelliJ and the build and run was successful. But when i tried testing it on postman, it showed error 500:Internal server error.
ReplyDeletePlease help resolve this problem.
Hi @NewOne102
DeleteWhat is the API you are calling on Postman? Please check if the port is 4000.