Travis CI (Continuous Integration) for GitHub Java-Maven Repository
Travis CI (Continuous Integration) for GitHub Java-Maven Repository
Introduction
Travis CI is a hosted, distributed continuous integration service used to build and test software projects hosted at GitHub. In this post I will give an overview of integrating Travis CI with an existing GitHub Java-Maven Project.
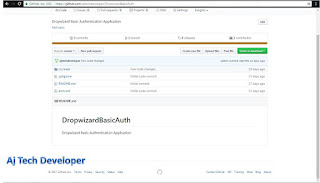
Here is how my GitHub Repository looks before Travis CI Integration
In this post I will help you to set up Travis CI for your existing GitHub Java-Maven repository in a few simple steps.
Step 1: Login to Travis CI
Go to Travis CI Website and login to it with GitHub credentials.
In the next page, allow the default permissions shown. After this, wait for sometime to sync with your GitHub repository.
Click on Accounts link under your username to show all projects in your GitHub Repository.
Step 2: Flick Repository Switch ON
Flick the Switch ON for the Repository that you would like to integrate to Travis CI
Step 3: Add .travis.yml file to Repository
.travis.yml file is to be added to your repository. Since my project is a Java-Maven Project, here is the .travis.yml file for my project
language: java
jdk:
  - oraclejdk8
script: mvn clean install
Once this file is committed to your repository, automatically Travis CI build is triggered and this can be seen in the Travis CI site.
Please Note: From now on, Travis CI build will be triggered on every commit to your repository.
Step 4: Add Build Status to README file in your repository
In Travis CI site, click on the repository for which you are adding Travis CI.
Next to Repository name, click on the Build Status image, a popup will appear. In the popup, select your branch and in the second dropdown select Markdown
Copy Paste the code to your README.md in the GitHub repository and commit it. Again this will trigger a build in Travis CI.
The Build Status will appear in GitHub README file.
Conclusion and GitHub Link
In this post, I have given a comprehensive tutorial to integrate Travis CI to your existing GitHub Java-Maven repository. To check the build status or the Travis CI configuration used in this post, you can check my repository on GitHub.
Learn the most popular and trending technologies like Machine Learning, Angular 5, Internet of Things (IoT), Akka HTTP, Play Framework, Dropwizard, Docker, Elastic Stack, Spring Boot and Flask in simple steps by reading my most popular blog posts at Software Developer Central.
If you like my post, please feel free to share it using the share button just below this paragraph or next to the heading of the post. You can also tweet with #SoftwareDeveloperCentral on Twitter. To get a notification on my latest posts or to keep the conversation going, you can follow me on Twitter. Please leave a note below if you have any questions or comments.


What a post
ReplyDeleteHi @Michele, Thanks for your comment.
DeleteIf you are as of now utilizing Travis CI Build Monitoring, utilizing apartment suite is a best option in contrast to utilizing well-suited get and pip to introduce bundles. The Debian ropes given by Travis may exclude bundles for all forms of Python or may not be refreshed as fast.
ReplyDelete