Spring Boot Tutorial
Spring Boot Tutorial
Introduction
Spring Boot is one of the most popular and most used frameworks for building microservices. Here is a Basic Spring Boot Tutorial with the latest version of Sprint Boot (2.0.5.RELEASE), as of October 2018, which shows you how to build RESTful GET and POST APIs using Spring Boot.
What is Spring Boot?
From their website:
Takes an opinionated view of building production-ready Spring applications. Spring Boot favors convention over configuration and is designed to get you up and running as quickly as possible.
Spring Boot makes it easy to create stand-alone, production-grade Spring based Applications that you can "just run". We take an opinionated view of the Spring platform and third-party libraries so you can get started with minimum fuss. Most Spring Boot applications need very little Spring configuration.
Website: Spring Boot Website
Requirements to Run the Application:
1. Java
2. Maven
3. IDE of your choice
In a few simple steps I will help you to get a Spring Boot Application up and running which you can use as a base to build additional functionalities.
Here is the full pom.xml:
What is Spring Boot?
From their website:
Takes an opinionated view of building production-ready Spring applications. Spring Boot favors convention over configuration and is designed to get you up and running as quickly as possible.
Spring Boot makes it easy to create stand-alone, production-grade Spring based Applications that you can "just run". We take an opinionated view of the Spring platform and third-party libraries so you can get started with minimum fuss. Most Spring Boot applications need very little Spring configuration.
Website: Spring Boot Website
Requirements to Run the Application:
1. Java
2. Maven
3. IDE of your choice
In a few simple steps I will help you to get a Spring Boot Application up and running which you can use as a base to build additional functionalities.
Step 1: Requirements in pom.xml
The following are required in pom.xml:
        <parent>
            <groupId>org.springframework.boot</groupId>
            <artifactId>spring-boot-starter-parent</artifactId>
            <version>2.0.5.RELEASE</version>
        </parent>
        <dependency>
            <groupId>org.springframework.boot</groupId>
            <artifactId>spring-boot-starter-web</artifactId>
        </dependency>
<?xml version="1.0" encoding="UTF-8"?>
<project xmlns="http://maven.apache.org/POM/4.0.0" xmlns:xsi="http://www.w3.org/2001/XMLSchema-instance" xsi:schemaLocation="http://maven.apache.org/POM/4.0.0 http://maven.apache.org/xsd/maven-4.0.0.xsd">
 <modelVersion>4.0.0</modelVersion>
 <groupId>com.aj.basicspringboot</groupId>
 <artifactId>BasicSpringBoot</artifactId>
 <version>1.0.0</version>

    <parent>
  <groupId>org.springframework.boot</groupId>
  <artifactId>spring-boot-starter-parent</artifactId>
  <version>2.0.5.RELEASE</version>
 </parent>

 <properties>
        <jdk.version>1.8</jdk.version>
        <java.version>1.8</java.version>
        <packaging>jar</packaging>
 </properties>

 <dependencies>

  <dependency>
            <groupId>org.springframework.boot</groupId>
            <artifactId>spring-boot-starter-web</artifactId>
        </dependency>

 </dependencies>

 <build>
  <plugins>
            <plugin>
                <artifactId>maven-compiler-plugin</artifactId>
                <version>3.0</version>
                <configuration>
                    <source>1.8</source>
                    <target>1.8</target>
                </configuration>
            </plugin>
   <plugin>
    <groupId>org.springframework.boot</groupId>
    <artifactId>spring-boot-maven-plugin</artifactId>
   </plugin>
  </plugins>
 </build>
</project>
Step 2: Application class
The application class is the entry point for the Application. The following Annotation is added to this class:
- @SpringBootApplication
BasicSpringBootApplication.java
package com.aj.basicspringboot;

import org.springframework.boot.SpringApplication;
import org.springframework.boot.autoconfigure.SpringBootApplication;

@SpringBootApplication
public class BasicSpringBootApplication {

 public static void main(String[] args) {
  SpringApplication.run(BasicSpringBootApplication.class,args);
 }
}
Step 3: Controller Class for RESTful APIs
Java Class which acts as Rest Controller. In this class I have given examples of how to use:- @RequestMapping
- @RequestBody
- @PathVariable
- @GetMapping - For GET API
- @PostMapping - For POST API
PingController.java
package com.aj.basicspringboot.controller;

import com.aj.basicspringboot.domain.PingRequest;
import org.slf4j.Logger;
import org.slf4j.LoggerFactory;
import org.springframework.http.HttpStatus;
import org.springframework.http.ResponseEntity;
import org.springframework.web.bind.annotation.*;

import java.util.HashMap;
import java.util.Map;


@RestController
@RequestMapping("/")
public class PingController {

    private static final Logger logger = LoggerFactory.getLogger(PingController.class);

    @GetMapping("ping")
    public ResponseEntity<Map<String, String>> ping() {
        Map<String, String> response = new HashMap<>();
        response.put("message", "pong");
        return new ResponseEntity<>(response, HttpStatus.OK);
    }

    //GET API with path variable
    @GetMapping("ping/{message}")
 public ResponseEntity<Map<String, String>> pingPath(@PathVariable String message) {
  Map<String, String> response = new HashMap<>();
  response.put(message, "pong");
        return new ResponseEntity<>(response, HttpStatus.OK);
 }

    @PostMapping("ping")
    public ResponseEntity<Map<String, String>> send(@RequestBody PingRequest pingRequest) {
        logger.info("Request received is: " + pingRequest );
        Map<String, String> response = new HashMap<>();
        response.put("message", "");
        if("ping".equalsIgnoreCase(pingRequest.getInput())) {
            response.put("message", "pong");
        }
        return new ResponseEntity<>(response, HttpStatus.OK);
    }
}
Project Setup:
For Java Setup, please refer to: Java Setup
For Maven Setup, please refer to: Maven Setup
For Git and Project Setup, please refer to: Git and Project Setup
For Maven Setup, please refer to: Maven Setup
For Git and Project Setup, please refer to: Git and Project Setup
Run Application:
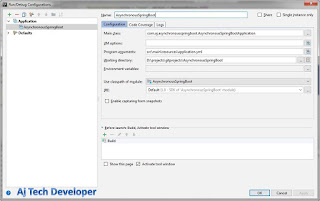
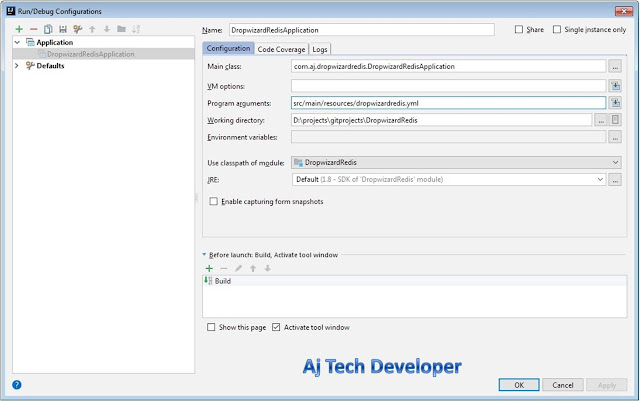
1. To run application in your IDE use:Program arguments: src/main/resources/application.yml
2. To run JAR from command prompt:
Build jar by using command:
mvn clean install
Run JAR by using command in Project folder location:
java -jar target\BasicSpringBoot-1.0.0.jar src\main\resources\application.yml
Please note: I have set the server port as 4000 in application.yml
API calls and results:
1. GET API for Ping:
http://localhost:4000/ping
2. GET API for Ping with Path Variable:
http://localhost:4000/ping/message
3. POST API for Ping: http://localhost:4000/ping
JSON Request Body:
  {
    "input": "ping"
  }
Conclusion and GitHub link:
This tutorial gives a basic introduction to writing RESTful APIs using Spring Boot. The code used in this post is available on GitHub.Learn the most popular and trending technologies like Machine Learning, Chatbots, Internet of Things (IoT), Big Data Processing, Elastic Stack, Angular 5, Akka HTTP, Play Framework, Dropwizard, Docker, Netflix Eureka, Netflix Zuul, Spring Cloud, Spring Boot, Flask and RESTful Web Service integration with MongoDB, Kafka, Redis, Aerospike, MySQL DB in simple steps by reading my most popular blog posts at Software Developer Central.
If you like my post, please feel free to share it using the share button just below this paragraph or next to the heading of the post. You can also tweet with #SoftwareDeveloperCentral on Twitter. To get a notification on my latest posts or to keep the conversation going, you can follow me on Twitter or Instagram. Please leave a note below if you have any questions or comments.


Comments
Post a Comment