Dropwizard Tutorial
Dropwizard Tutorial
Introduction
Today communication between web applications or microservices is achieved using RESTful APIs. The most popular framework to build RESTful APIs in the startup ecosystem is Dropwizard.Dropwizard is also one of the most popular and most used frameworks for building microservices.
In this tutorial, we will be creating a Dropwizard Application with GET API, POST API and basic healthcheck code and configuration. Asynchronous processing can also be done in Dropwizard using Java 8 features. I will give an example for Asynchronous processing in a GET API in the code below.
.
What is Dropwizard?
From their website: Dropwizard is a Java framework for developing ops-friendly, high-performance, RESTful web services.
Website: Dropwizard Website
The following libraries will get added to your classpath once Dropwizard is added in your project:
- Jetty to embed a HTTP server directly into your project.
- Jersey for building RESTful web applications.
- Jackson for JSON support in your project.
- Metrics library for code related metrics
- Guava Google Core Libraries for Java
- Logback and slf4j for logging
- Hibernate Validator framework for validating user input and generating helpful and i18n-friendly error messages.
- The Apache HttpClient for interaction with other web services.
- JDBI to use a relational database with Java.
- Liquibase to keep your database schema in check throughout your development and release cycles.
- Freemarker and Mustache simple templating systems
- Joda Time library for handling dates and times.
Requirements to Run the Application:
1. Java
2. Maven
3. IDE of your choice
In this tutorial I will help you to build a basic Web Application using Dropwizard in a few simple steps.
Step 1: Dependencies in pom.xml
Add dropwizard-core library. I have also used swagger-annotations for API level documentation or API metadata. However this library is optional and can be skipped if you don't require API level documentation.Full pom.xml:
<?xml version="1.0" encoding="UTF-8"?>
<project xmlns="http://maven.apache.org/POM/4.0.0" xmlns:xsi="http://www.w3.org/2001/XMLSchema-instance" xsi:schemaLocation="http://maven.apache.org/POM/4.0.0 http://maven.apache.org/xsd/maven-4.0.0.xsd">
 <modelVersion>4.0.0</modelVersion>
 <groupId>com.aj.basicdropwizard</groupId>
 <artifactId>BasicDropwizard</artifactId>
 <version>1.0.0</version>


 <properties>
  <dropwizard.version>1.1.2</dropwizard.version>
        <swagger.version>1.5.3-M1</swagger.version>
        <jdk.version>1.8</jdk.version>
  <packaging>jar</packaging>
 </properties>

 <dependencies>

  <dependency>
            <groupId>io.dropwizard</groupId>
            <artifactId>dropwizard-core</artifactId>
            <version>${dropwizard.version}</version>
        </dependency>

        <dependency>
            <groupId>com.wordnik</groupId>
            <artifactId>swagger-annotations</artifactId>
            <version>${swagger.version}</version>
        </dependency>

 </dependencies>

 <build>
  <plugins>
   <plugin>
    <artifactId>maven-compiler-plugin</artifactId>
    <version>3.0</version>
    <configuration>
     <source>1.8</source>
     <target>1.8</target>
    </configuration>
   </plugin>
   <plugin>
    <groupId>org.apache.maven.plugins</groupId>
    <artifactId>maven-jar-plugin</artifactId>
    <version>2.4</version>
   </plugin>
   <plugin>
    <groupId>org.apache.maven.plugins</groupId>
    <artifactId>maven-shade-plugin</artifactId>
    <version>2.3</version>
    <configuration>
     <createDependencyReducedPom>true</createDependencyReducedPom>
     <filters>
      <filter>
       <artifact>*:*</artifact>
       <excludes>
        <exclude>META-INF/*.SF</exclude>
        <exclude>META-INF/*.DSA</exclude>
        <exclude>META-INF/*.RSA</exclude>
       </excludes>
      </filter>
     </filters>
    </configuration>
    <executions>
     <execution>
      <phase>package</phase>
      <goals>
       <goal>shade</goal>
      </goals>
      <configuration>
       <transformers>
        <transformer implementation="org.apache.maven.plugins.shade.resource.ServicesResourceTransformer" />
        <transformer implementation="org.apache.maven.plugins.shade.resource.ManifestResourceTransformer">
         <mainClass>com.aj.basicdropwizard.BasicDropwizardApplication</mainClass>
        </transformer>
       </transformers>
      </configuration>
     </execution>
    </executions>
   </plugin>
  </plugins>
 </build>
</project>
Step 2: Basic yml configuration and Configuration Class
- Server port is mentioned as : 4000
- /admin is configured as the Admin Context path. This is used for Health Check API as mentioned below
- All Logging configuration can be done in the yml file. There is no need for a separate logback.xml in the application. I have used console logging in my application.
- I have created a field appName, which I use in the Health Check Resource. You can see how to define and use fields from the yml file. For using this field you have to use a Configuration class. You can see how I am creating appName in the configuration class below. Then this is used in BasicDropwizardHealthCheckResource.java below.
basicdropwizard.yml:
logging:
  level: INFO

  appenders:
    - type: console
      threshold: ALL
      timeZone: IST

server:
  type: simple
  applicationContextPath: /
  adminContextPath: /admin
  connector:
      port: 4000
      type: http

appName : BasicDropwizard
Configuration Class: BasicDropwizardConfiguration.java
package com.aj.basicdropwizard;

import com.fasterxml.jackson.annotation.JsonProperty;
import io.dropwizard.Configuration;

import com.fasterxml.jackson.annotation.JsonIgnoreProperties;

@JsonIgnoreProperties(ignoreUnknown = true)
public class BasicDropwizardConfiguration extends Configuration {

    @JsonProperty
    public String appName;

    public String getAppName() {
        return appName;
    }

    public void setAppName(String appName) {
        this.appName = appName;
    }
}
Step 3: Resources (Add RESTFul APIs):
PingResource.java:This file has 3 APIs:
- Ping GET API
- Ping POST API
- GET API with code for Asynchronous Processing.
Here is the code:
package com.aj.basicdropwizard.resource;

import com.aj.basicdropwizard.domain.PingRequest;
import com.codahale.metrics.annotation.Timed;
import com.wordnik.swagger.annotations.Api;
import com.wordnik.swagger.annotations.ApiOperation;
import org.slf4j.Logger;
import org.slf4j.LoggerFactory;

import javax.ws.rs.*;
import javax.ws.rs.core.MediaType;
import javax.ws.rs.core.Response;
import java.util.HashMap;
import java.util.Map;
import java.util.concurrent.CompletableFuture;


@Path("/ping")
@Produces(MediaType.APPLICATION_JSON)
@Api(value = "ping", description = "Ping Resource for checking if application is up")
public class PingResource {

    private static final Logger logger = LoggerFactory.getLogger(PingResource.class);

 @Timed
 @GET
 @Produces(MediaType.APPLICATION_JSON)
 @ApiOperation(value ="ping")
 public Response ping() {
  Map<String, String> response = new HashMap<>();
  response.put("message", "pong");
  return Response.ok(response).build();
 }

    @POST
    @Timed
    @Produces(MediaType.APPLICATION_JSON)
    @Consumes(MediaType.APPLICATION_JSON)
    public Response send(PingRequest pingRequest) throws Exception {
        logger.info("Request received is: " + pingRequest );
        Map<String, String> response = new HashMap<>();
        response.put("message", "");
        if("ping".equalsIgnoreCase(pingRequest.getInput())) {
            response.put("message", "pong");
        }
        return Response.ok(response).build();
    }

    @Timed
    @GET
    @Path("/async")
    @Produces(MediaType.APPLICATION_JSON)
    public Response async() {
        Map<String, String> response = new HashMap<>();
        CompletableFuture<Void> future = CompletableFuture.runAsync(() -> {
            try {
                Thread.sleep(15 * 1000);
                logger.info("Processing complete");
            } catch (InterruptedException ie) {
                logger.error("Error in PingResource.async(): {}", ie.getMessage());
            }
        });
        response.put("message", "Request is under process");
        return Response.ok(response).build();
    }
}
Step 4: Basic Health Check Configuration
BasicDropwizardHealthCheckResource.java
package com.aj.basicdropwizard.resource;

import com.aj.basicdropwizard.BasicDropwizardConfiguration;
import com.codahale.metrics.health.HealthCheck;
import org.slf4j.Logger;
import org.slf4j.LoggerFactory;

public class BasicDropwizardHealthCheckResource extends HealthCheck {

    private static final Logger logger = LoggerFactory.getLogger(BasicDropwizardHealthCheckResource.class);

    private static String appName;

    public BasicDropwizardHealthCheckResource(BasicDropwizardConfiguration basicDropwizardConfiguration){
       this.appName = basicDropwizardConfiguration.getAppName();
    }

    @Override
    protected Result check() throws Exception {
        logger.info("App Name is: {}", appName);
        if("BasicDropwizard".equalsIgnoreCase(appName)) {
            return Result.healthy();
        }
        return Result.unhealthy("Basic Dropwizard Service is down");
    }
}
Step 5: Application Class
Application class is the entry point for any Dropwizard application. It will have to extend the io.dropwizard.Application class and implement the initialize(Bootstrap<Configuration>)
and run(Configuration, Environment) methods. Thus the runtime environment of the application is setup.
In this example I have used my custom Configuration: BasicDropwizardConfiguration which extends io.dropwizard.Configuration
The run method is called from public static void main(String[] args) {} method.
In the Application class, all the resources should be registered. You can see how I am setting up the following in the Application class:
BasicDropwizardApplication.java:In the Application class, all the resources should be registered. You can see how I am setting up the following in the Application class:
- Configuration class: BasicDropwizardConfiguration
- Health check resource: BasicDropwizardHealthCheckResource
- Other resources: PingResource
package com.aj.basicdropwizard;

import com.aj.basicdropwizard.resource.BasicDropwizardHealthCheckResource;
import com.aj.basicdropwizard.resource.PingResource;
import io.dropwizard.Application;
import io.dropwizard.setup.Bootstrap;
import io.dropwizard.setup.Environment;
import org.slf4j.Logger;
import org.slf4j.LoggerFactory;


public class BasicDropwizardApplication extends Application<BasicDropwizardConfiguration> {

    private static final Logger logger = LoggerFactory.getLogger(BasicDropwizardApplication.class);

 public static void main(String[] args) throws Exception {
  new BasicDropwizardApplication().run("server", args[0]);
 }

    @Override
    public void initialize(Bootstrap<BasicDropwizardConfiguration> b) {
    }

 @Override
 public void run(BasicDropwizardConfiguration config, Environment env)
   throws Exception {
        logger.info("Registering RESTful API resources");
  env.jersey().register(new PingResource());
  env.healthChecks().register("BasicDropwizardHealthCheck",
    new BasicDropwizardHealthCheckResource(config));
 }
}
Project Setup:
For Java Setup, please refer to: Java Setup
For Maven Setup, please refer to: Maven Setup
For Git and Project Setup, please refer to: Git and Project Setup
For Maven Setup, please refer to: Maven Setup
For Git and Project Setup, please refer to: Git and Project Setup
Run Application:
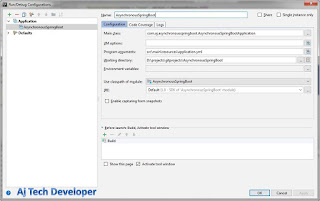
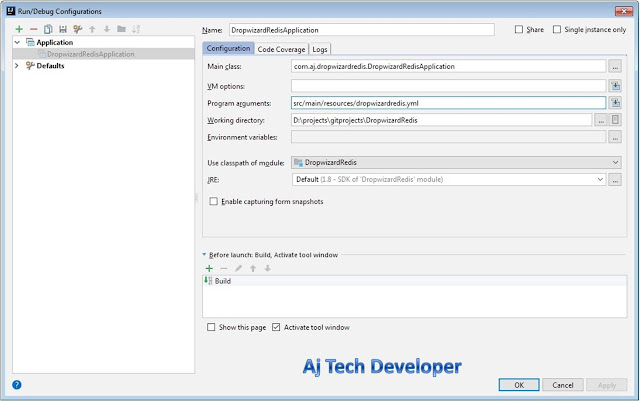
1. To run application in your IDE use:Program arguments: src/main/resources/basicdropwizard.yml

2. To run JAR from command prompt:
Build jar by using command:
mvn clean installRun JAR by using command in Project folder location:
java -jar target\BasicDropwizard-1.0.0.jar src\main\resources\basicdropwizard.yml
API calls and results:
1. GET API for Application Health Check:http://localhost:4000/admin/healthcheck

2. GET API for Ping:
http://localhost:4000/ping

3. POST API for Ping:
http://localhost:4000/ping
JSON Request Body:
  {
   "input": "ping"
  }

4. GET Admin API to see application metrics: Dropwizard provides this Admin API. As I have set adminContextPath as: /admin in basicdropwizard.yml the link I need to use in any browser is: http://localhost:4000/admin/
You can click on individual links on this page to see different application metrics.

5. GET API to execute asynchronous processing:
http://localhost:4000/ping/async
http://localhost:4000/ping/async


Conclusion and GitHub link:
This tutorial gives a basic introduction to writing RESTful APIs using Dropwizard. The code used in this post is available on GitHub.To learn more about Dropwizard, please check my most popular Dropwizard Posts.
Learn the most popular and trending technologies like Blockchain, Cryptocurrency, Machine Learning, Chatbots, Internet of Things (IoT), Big Data Processing, Elastic Stack, React, Progressive Web Application (PWA), Angular 5, GraphQL, Akka HTTP, Play Framework, Dropwizard, Docker, Netflix Eureka, Netflix Zuul, Spring Cloud, Spring Boot, Flask and RESTful Web Service integration with MongoDB, Kafka, Redis, Aerospike, MySQL DB in simple steps by reading my most popular blog posts at Software Developer Central.
If you like my post, please feel free to share it using the share button just below this paragraph or next to the heading of the post. You can also tweet with #SoftwareDeveloperCentral on Twitter. To get a notification on my latest posts or to keep the conversation going, you can follow me on Twitter or Instagram. Please leave a note below if you have any questions or comments.

Hi, thanks for such an amazing post. I was able to run the job in a timely manner. Though I have couple of questions, it would help me if you could address those.
ReplyDelete1. By default how to pick up the basicdropwizard.yml file, without passing in the cmd line?
2. How to stop the job using the curl command?
Thanks in advance!
Hi, you can config "run configuration" in IDE to run this application without the culr command.
Delete