Asynchronous Processing (@Async) in Spring Boot
Asynchronous Processing (@Async) in Spring Boot
Introduction
I am assuming that you have a Basic Knowledge of Spring Boot and have a Basic Spring Boot Application running in your machine. If not, please check my blog on Basic Spring Boot Application by going to the link: Spring Boot Tutorial
In this tutorial, we will be creating a Spring Boot Application which has the ability to perform Asynchronous Processing
Requirements to Run the Application:
In this tutorial, we will be creating a Spring Boot Application which has the ability to perform Asynchronous Processing
Requirements to Run the Application:
- Java
- Maven
- IDE of your choice
Once you have a Basic Spring Boot Application, here are the additional steps required to add the ability to perform Asynchronous Processing.
Step 1: Add @EnableAsync annotation and Add TaskExecutor Bean to Application Class
@EnableAsync annotation turns on Spring’s ability to run @Async methods in a background thread pool.
This class customizes the used TaskExecutor. Here I am limiting the number of concurrent threads to 3 and the size of the queue to 600. Here is the code:
AsynchronousSpringBootApplication.java
This class customizes the used TaskExecutor. Here I am limiting the number of concurrent threads to 3 and the size of the queue to 600. Here is the code:
AsynchronousSpringBootApplication.java
package com.aj.asynchronousspringboot;

import org.slf4j.Logger;
import org.slf4j.LoggerFactory;
import org.springframework.beans.factory.annotation.Value;
import org.springframework.boot.SpringApplication;
import org.springframework.boot.autoconfigure.SpringBootApplication;
import org.springframework.context.annotation.Bean;
import org.springframework.core.task.TaskExecutor;
import org.springframework.scheduling.annotation.EnableAsync;
import org.springframework.scheduling.concurrent.ThreadPoolTaskExecutor;

@SpringBootApplication
@EnableAsync
public class AsynchronousSpringBootApplication {

    private static final Logger logger = LoggerFactory.getLogger(AsynchronousSpringBootApplication.class);

    @Bean(name="processExecutor")
    public TaskExecutor workExecutor() {
        ThreadPoolTaskExecutor threadPoolTaskExecutor = new ThreadPoolTaskExecutor();
        threadPoolTaskExecutor.setThreadNamePrefix("Async-");
        threadPoolTaskExecutor.setCorePoolSize(3);
        threadPoolTaskExecutor.setMaxPoolSize(3);
        threadPoolTaskExecutor.setQueueCapacity(600);
        threadPoolTaskExecutor.afterPropertiesSet();
        logger.info("ThreadPoolTaskExecutor set");
        return threadPoolTaskExecutor;
    }

    public static void main(String[] args) throws Exception {
  SpringApplication.run(AsynchronousSpringBootApplication.class,args);
 }
}
Step 2: Add Method which executes an Asynchronous Process
Spring’s @Async annotation is used in process() method. @Async annotation indicates that this method will run on a separate thread.
I am using a Thread.sleep operation as an example. This can be replaced by any required operation that takes some time for processing like a call to an API or a process operation which updates a record in a database with the status after processing or any other operation.
ProcessServiceImpl.java
package com.aj.asynchronousspringboot.service.impl;

import com.aj.asynchronousspringboot.service.ProcessService;
import org.slf4j.Logger;
import org.slf4j.LoggerFactory;
import org.springframework.scheduling.annotation.Async;
import org.springframework.stereotype.Service;

@Service
public class ProcessServiceImpl implements ProcessService {

    private static final Logger logger = LoggerFactory.getLogger(ProcessServiceImpl.class);

    @Async("processExecutor")
    @Override
    public void process() {
        logger.info("Received request to process in ProcessServiceImpl.process()");
        try {
            Thread.sleep(15 * 1000);
            logger.info("Processing complete");
        }
        catch (InterruptedException ie) {
            logger.error("Error in ProcessServiceImpl.process(): {}", ie.getMessage());
        }
    }
}
Step 3: Add an API in the Controller to execute the asynchronous processing
Here is the GET API:
@RequestMapping(value = "ping/async", method = RequestMethod.GET)
    public ResponseEntity<Map<String, String>> async() {
        processService.process();
        Map<String, String> response = new HashMap<>();
        response.put("message", "Request is under process");
        return new ResponseEntity<>(response, HttpStatus.OK);
    }
Project Setup:
For Java Setup, please refer to:Java SetupFor Maven Setup, please refer to: Maven Setup
For Git and Project Setup, please refer to: Git and Project Setup
Run Application:
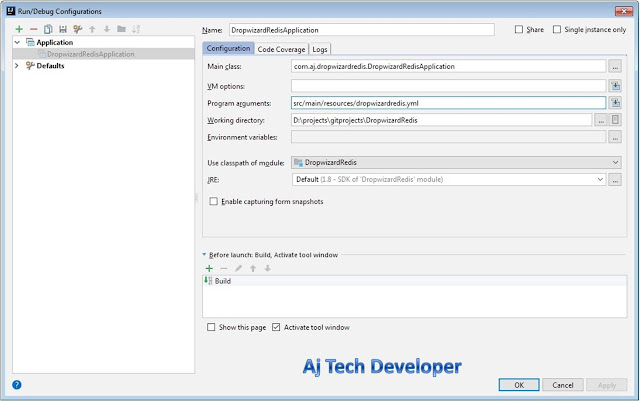
1. To run application in your IDE use:
Program arguments: src\main\resources\application.yml

Build jar by using command:
mvn clean install
Run JAR by using command in Project folder location:
java -jar target\AsynchronousSpringBoot-1.0.0.jar src\main\resources\application.ymlPlease note: I have set the server port as 4000 in application.yml
API calls and results:
1. GET API to execute asynchronous processing:
As per code, after 15 seconds, Processing complete log message is displayed in the console.

Other than this API, this application also has the following APIs:
1. GET API for Ping:
http://localhost:4000/ping
2. POST API for Ping:
http://localhost:4000/ping
   {
    "input": "ping"
   }
Conclusion and GitHub link:
This tutorial gives a basic introduction to how Asynchronous Processing can be achieved using Spring Boot. The code used in this post is available on GitHub.Learn the most popular and trending technologies like Blockchain, Cryptocurrency, Machine Learning, Chatbots, Internet of Things (IoT), Big Data Processing, Elastic Stack, React, Progressive Web Application (PWA), Angular 5, GraphQL, Akka HTTP, Play Framework, Dropwizard, Docker, Netflix Eureka, Netflix Zuul, Spring Cloud, Spring Boot, Flask and RESTful Web Service integration with MongoDB, Kafka, Redis, Aerospike, MySQL DB in simple steps by reading my most popular blog posts at Software Developer Central.
If you like my post, please feel free to share it using the share button just below this paragraph or next to the heading of the post. You can also tweet with #SoftwareDeveloperCentral on Twitter. To get a notification on my latest posts or to keep the conversation going, you can follow me on Twitter or Instagram. Please leave a note below if you have any questions or comments.

Good and simple sample, thank you.
ReplyDeletePlease add this line in the sample for Async call:
@RequestMapping(value = "ping", method = RequestMethod.GET)
public ResponseEntity> ping() {
Map response = new HashMap<>();
processService.process(); // <-------------- !!!!!!! Async CALL
response.put("message", "pong");
return new ResponseEntity<>(response, HttpStatus.OK);
}
Hi @Виталий
DeleteThanks for your comment.
The API that you have mentioned in your comment is just a Ping API to test if the application is up and running. Ping API:
@RequestMapping(value = "ping", method = RequestMethod.GET)
public ResponseEntity> ping() {
Map response = new HashMap<>();
response.put("message", "pong");
return new ResponseEntity<>(response, HttpStatus.OK);
}
I have shown the Async Call in another API in the same class which is mentioned in Step 3 in my post.
@RequestMapping(value = "ping/async", method = RequestMethod.GET)
public ResponseEntity> async() {
processService.process();
Map response = new HashMap<>();
response.put("message", "Request is under process");
return new ResponseEntity<>(response, HttpStatus.OK);
}
Good job! Brilliantly straightforward - Thanks
ReplyDeleteHi @R
DeleteThanks for your comment.
Hi,
ReplyDeleteI have followed each step but the initial message is return only after the specified time.
Actually, I am trying to build application that will accept few params and process them and return like the "data is valid" message after processing step 1. Then I have another process for the same request that would take some times and when it is done i want the use to see it (using same request or new request using controller).
Can you please help me with this?
@Sahil, do you really need asynchronous processing? From your comment I see that you want to do 2 operations one after the other and get response in the same request. So for this just create one API and do the processing one after the other and return the response after all processing is done.
Delete